How to install a washing machine level. Rules for installing a washing machine
Installation washing machine can be done independently, but it is better to entrust this work to an experienced master. It will not make mistakes, and your device will serve properly year after year.
1
Modern man is difficult to imagine your life without a washing machine. Therefore, in almost every apartment a machine has already been installed, which is tirelessly serving its owner. But any equipment fails sooner or later and requires urgent replacement. And here certain problems may arise: sometimes the machine erases poorly, then the spinning does not work, but more often the machine simply vibrates and moves throughout the whole area of the bathroom during work. The reason for such inconvenience is one: the installation of the washing machine with their own hands was made incorrectly and in violation of the rules prescribed in the technical documentation.
Machine for washing clothes
To avoid marked incidents with your washing machine, it is recommended to always adhere to the rules described in the technical passport for the product. Alas, the detailed description of the installation steps in Russian is not always present to the user, since not all manufacturers took care of the translation of the instructions. In this case, you will have to follow the rules that must be followed when installing a washing machine of any kind.
- A grounding outlet is required. It is installed for the machine at a height of 30 cm from the floor. The use of various kinds of extension cords for connecting a washing machine is strictly prohibited. The outlet is better to use the invoice.
- The surface on which the washing machine will stand must be perfectly flat, located horizontally and have sufficient rigidity. A wooden floor surface (if it is preserved) is the worst option. The concrete base will be much more reliable.
- The sink should be provided with a special siphon having a nozzle for connecting the drain hose of the washing machine.
- In a bathroom where installation and connection of the washing machine will be carried out, reliable ventilation has to be organized. So you protect the device from premature oxidation of contacts.
2
The connection of the washing machine should be carried out in stages. First you need to prepare it for installation. To do this, remove the packaging, immediately check whether the washing machine is fully equipped, and visually examine the electrical cable, plug and drain hose. They should not have mechanical damage and creases. Next you need to remove the fixing plugs from the back of the machine. They are installed by the manufacturer in order to ensure that the drum is securely fixed during the transportation of the product, otherwise its vibrations could damage the drive.
We move the car to the place of its installation. The distance between the rear panel of the product and the wall is limited by a gap of 10 cm. The cable can be connected to the electrical network.
Installation location of the washing machine
Now look under the sink. If your siphon meets the requirement (there is a nozzle for connecting the drain hose), then you can safely make the installation. Otherwise, the siphon needs to be replaced with a more modern counterpart. At the same time pay attention to the rubber seals. In order for the machine to not flow from under the siphon, all rubber seals and gaskets must be sufficiently rigid. When choosing a siphon you need to pay attention to this. It is very easy to assemble the siphon on your own, as detailed instructions with a drawing are attached to it.
Installing a washing machine implies proper positioning of the drain hose. Bending it will not be important. The main thing here is the height limit. The hose must be located not less than 90 cm from the floor. Otherwise, the machine will begin to draw water from the drainage system and will not cope with its immediate task. You can hide the bend of the drain hose in the space under the sink. Suitable for these purposes as a stand (if the sink type "tulip"), and a bedside table under the sink.
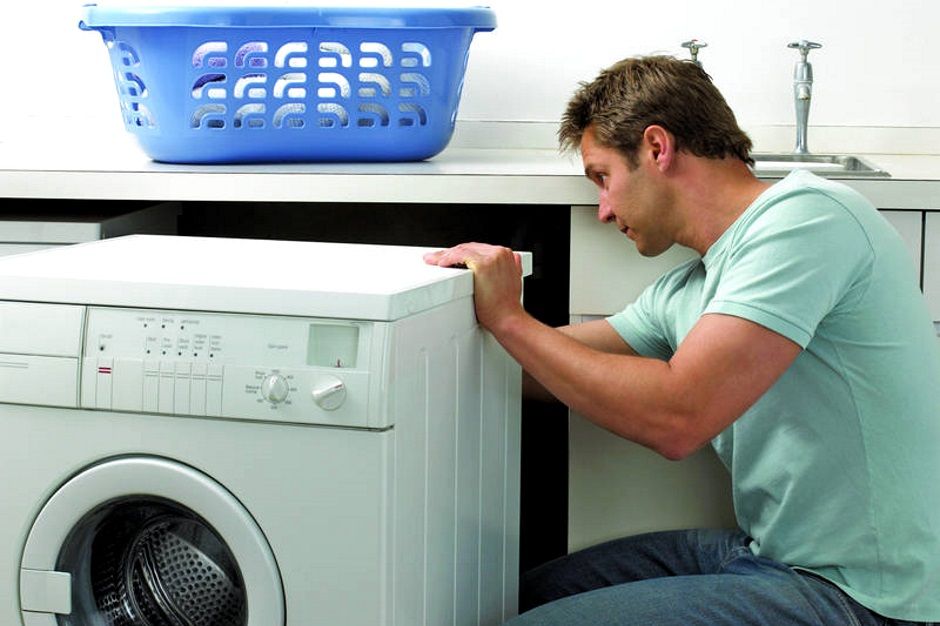
The final installation of the automatic washing machine is made using the building level and consists in adjusting the legs. You have to align the top panel of the machine horizontally in all directions. Adjust the legs until we achieve a perfectly horizontal position of the top panel of the machine. The legs themselves should bear the load evenly. It is necessary for the machine not to jump in the future, otherwise the connection of the washing machine can be considered incorrect.
3
Sometimes users claim that the connection of the washing machine can be considered final after checking it in the “idle” mode of washing (without laundry). Alas, such an opinion is popular among the population. It is much more accurate to assume that the installation and connection were made correctly if the machine qualitatively carried out the first full wash.
It is not recommended to make tests immediately after purchase and quick installation (if you have any). The machine must stand in the room for some time in order to come into thermodynamic equilibrium with the air in the bathroom. It should warm up or cool down (depending on the season). This is necessary so that condensate does not collect in the electronic system and does not lead to a short circuit. In the future, you should conduct a test wash. "Twist" machine without linen is not necessary. The water quality control system, which modern washing machines are equipped with, will “see” clean water and will not work properly in the future.
![]()
Test wash
For the first wash is enough to load half the recommended maximum rate.
So you do not overload the device and will be able to fully appreciate its work at all stages of washing. The first wash control should be constant, as various unforeseen situations are possible. If they are detected, you need to contact the service department to correct the deficiencies.
4 Connecting the washing machine to the mains
Additional installation problems may arise if there is no outlet in the bathroom near the washing machine. As noted earlier, it is forbidden to use different types of carrying and extension cords. You need to independently install the outlet for the washing machine. Electrical cable can be held by hiding it in a special plastic casing or by mounting it into the wall. The second option is preferable, but for you it is more troublesome work. It is necessary to make walls, install special holders in the cavity, lay the cable and then align the walls. Finishing works are also coming, so the entire installation will be long and rather costly. But saving in this case does not make sense, since you will lose security.
The electrical cable for mounting the outlet under the washing machine must be separated from other electrical appliances. Parallel connection with electrical appliances in this case is unacceptable, since the total power may be excessive for electrical wiring. It is possible to connect the washing machine only to a separate branch. An exception may be only in the case when an additional line cannot be maintained. This situation will require you to turn off other appliances for the period of washing.
Proper installation of the washing machine often means that you will use additional equipment in the bathroom. Additional accessories may include: a rubber mat (placed under the legs of the machine to reduce vibration) and a rubber mat that attaches to the vertical wall of the bathroom from the back of the machine.
If you are tired of washing by hand and decide to purchase an automatic machine, then it is important to note that it is not enough to buy a single purchase to start using the equipment immediately. To save money and not to pay for the installation of equipment, try installing it yourself, using the rules for installing a washing machine. But first, check with the sellers if the warranty on this household unit is lost, if you install it yourself. If the warranty is maintained, then you can safely carry out the installation yourself, after reading our article.
Proper installation of the washing machine
The process of connecting the washing machine with their own hands is technically not complicated, but rather responsible. It is important to note that the probability of electrical breakdown in a washing machine is several times higher than in dishwasher. Therefore, for safe and long-term operation of the machine, it is necessary to properly prepare the workplace for it.
This can be done both independently and with the help of specialists, because the right choice depends not only on your desire and ability. Basically, everything depends on grounding.
Reputable trade organizations often include the cost of installation in the cost of goods. It seems to be quite good, because the surcharge itself is not large (since the case has been put on stream). But there are several nuances:
- Reputable firms sell modern expensive models, and if you want to buy a budget option, then there you will not find it.
- Dealers do not engage in protective grounding equipment, since it must be equipped in advance. In case of its absence, the company refuses to install. As a result, you lose a premium and a guarantee, because the installation rules of a washing machine of any model clearly prescribe that the operation of the unit without grounding or protective devices is unacceptable.
Important! Based on these factors, before you choose, buy and go to the installation of household appliances on their own, check in advance the presence of grounding. If it is missing - provide it with your own hands.
Installation steps
 To serve the washing machine for a long time, you must follow the rules of the installation of the washing machine and do everything in stages. Immediately determine and note the list of steps that you need to go. Study proposed detailed instructions will allow you not only to learn all the rules of installation of the washing machine, but to understand them and do everything correctly and quickly.
Stage # 1 - preparation
- Inspect the purchased equipment. If you ordered home delivery when purchasing the equipment, then do not rush to sign on the courier delivery form. This is one of the first rules for installing a washing machine. Proceed as follows:
- Ask the couriers to unpack the washing machine.
- Carefully check the outer coating for dents or scratches.
- Lightly shake the car from side to side, and if you heard strange noises and knocks inside the machine, ask to replace the unit.
- If you do not like something, then immediately inform the couriers. Do not put a signature in the receipt until all problems are resolved, because you have spent a lot of money to buy.
- Remove all shipping parts. Take care of dismantling all the details of transportation: cubes, brackets, bolts. Read the instructions in advance to recognize all the shipping parts, because if you turn on the unit without dismantling, then the machine’s breakdown is guaranteed.
- Inspect the installation site. We hope that you have previously designated the location of the washing machine, because all the measurements - both in height and in width, and all the preparatory work must be done before the purchase. They include the achievement of such conditions:
- The surface under the machine must be solid (reinforced concrete), any bulges and dents - both on the surface of the walls and the floor are prohibited.
- The equipment should be at a distance of at least 2-3 cm from the wall. Since it vibrates during operation, the installation rules of the washing machine strictly prohibit the installation of the unit against the wall.
- Place the machine on the prepared site using a level. To make the car stand flat and level, use the level. Pay attention to the special supports, which are at the bottom of household appliances - they are regulated. Fix each leg at the required height using a special lock-nut. Hold it tight so that during operation, the legs do not unwind.
Important! In the new models of devices such supports are only in front of the unit.
Stage 2 - Connecting the appliance to the water supply
Almost all washing machines are connected to cold water. If at the place of installation of the unit there is already an outlet for the washing machine, then no difficulties will arise. If there is no such allotment, then you will have to make all the tie-ins yourself.
Important! For iron pipes you will need a welding machine, and for plastic pipes you will need a soldering iron. If you do not have either one or the other, then purchase a crimp sleeve. Produce it for different diameters of pipes. It is possible to install such a tap on both plastic and iron pipes.
You can purchase a tap-off coupling at any hardware store or in the construction market. You will need a 15 mm or more outlet tap, depending on the diameter of your pipes.
To make an independent connection to the water supply, purchase the following parts:
- Tee.
- Valve.
- Adapter from ½ inch thread to ¾ inch thread.
- PTFE sealing tape.
Put all the details together, and when the assembly is assembled:
- Cut the water pipe.
- Insert tee.
- Attach the adapter and the hose from the machine to the valve.
Important! When an emergency groove valve will allow you to disconnect from the plumbing washing machine, not blocking the plumbing itself.
During installation, use rubber gaskets and bolts for ties and girth.
Stage number 3 - connect to the sewer
The rules for installing a washing machine imply not only connecting it to the water supply for supplying water during the wash cycle. It is also necessary to arrange the discharge system for the waste volume of liquid — through the sewage system.
To connect to the sewer line, prepare the following tools and materials:
- Tee 50 mm.
- Branch with a diameter of 50 mm and 40 cm long.
- Coupling.
- Clamp mounting.
- Rubber cuff.
- Air valve 50 mm.
Important! In the room where the unit will be located, it is necessary to ensure free access of the drain hose to the drain point - the correct installation of the washing machine will depend on this.
![]() After completing this work:
After completing this work:
- Using a hacksaw, make an entry for a 12 cm pipe at this location.
- Insert the 50 mm tee into the hole and the coupling.
- Install plastic pipes in such a way that they can be freely moved from side to side to install the tee and coupling.
Important! Pay special attention to the sewer riser: in the bathroom the riser is 10 cm, but in the kitchen 2 times less.
Stage №4 - electrical connection
The most difficult stage of the work, which is supposed to be the installation rules of the washing machine, is its connection to the power grid. Here you need to be extremely careful.
Important! The energy consumed by the washing machine is approximately 2.5 kW. Therefore, the room in which the unit is located, is considered dangerous, since they have very high electrical voltage.
Before starting work, it is necessary to study the device of the machine and to prepare additional accessories. Take the following information:
- AT newest cars grounding and double insulation are present to increase the safety of automatic machines. D
- to connect the washing machine to the mains, you must have a special outlet with built-in grounding terminal.
Important! These sockets are jokingly called “Euro-sockets” because of their high quality, because the old sockets are designed for only 6A current, and the new ones are free to carry 16A current.
- It is better to choose a wall outlet from a ceramic material, since plastic models are unsafe.
- Install the outlet as close as possible to the washing machine, as the unit cord is 1.5 m in length.
- Do not ignore safety rules and select a high-quality outlet with a grounding contact present.
Important! All extension cords, adapters, tees significantly reduce the protection against a surge of electricity and increase the risk of fire, and can also cause a short circuit.
Currently, new outlets are installed in the bathroom, since this is where the washing machine is most often located. But do not forget that it is in the bathroom that the humidity is high and this has serious consequences.
Important! To reduce the risk of electric shock, install an RCD. It is able to de-energize the electrical circuit during a surge in electricity and emergency situations.
Stage №5 - test start of the unit
After installing the equipment, conduct a test launch of the device. Pour washing powder to wash the machine from the factory grease and small debris, run the wash mode. At this time, pay special attention to the following points:
- How water is poured.
- How fast the water heats up.
- How the machine holds the spin.
- Does it drain correctly?
Important! If everything works “like a clock,” it means that you performed the installation correctly and you can start using household appliances.
- You should not overpay for the valve for hot water and connect the unit to the hot water supply, because such a connection can cause a lot of problems when washing delicate things.
- To reduce noise and vibration in a washing machine, use rubber coasters.
- When installing the washing machine, do not use the inconvenient drain in the bath or sink using a regular drain hook. This method has a lot of drawbacks: when working with the unit, you will not be able to use the sink or bathtub, in addition, the siphons of the sinks and bathtubs often become clogged, and water can overflow over the edge.
- To prevent sewage water from entering the machine, fix the drain hose above the drain into the sewer system by about 60-80 cm.
- The washing machine is equipped with a wire with a euro plug, which means that when connected, be sure to buy an euro socket, which has a third contact for connecting the ground wire. Sometimes this outlet is included when buying equipment.
- Do not build up the drain hose, as in low-capacity machines the drain pump is low-powered and the additional hydraulic resistance of the long hose will overload it. As a result, the pump will quickly fail.
- The drain hose must be securely fastened to prevent it falling to the floor and flooding the apartment.
In order for the washing machine to work for a long time and not create problems, install it correctly and provide reliable grounding. Then washing the laundry will not just bring you pleasure, but also save time - both on the wash itself and on troubleshooting.
0A washing machine, especially an automatic one, is an absolutely necessary thing in the household. You just need to load the laundry and add detergent - and then the smart device will do everything on its own.
For the machine to work long and reliably, it is required to provide it with all the necessary conditions. Therefore, the time of installation is very important. Proper connection will ensure high-quality washing and trouble-free operation.
Think about where and how to put the car, you need to even purchase. Its dimensions, power, type of construction are determined not only by the wishes of the owners, but also by the availability of opportunities in the apartment.
Prerequisites for installation
The easiest way to install a washing unit near the points of connection to water and electricity. In this case, there will be no problems with the extension of the hoses and electrical cables.
The aesthetic component and ease of use, too, should not be ignored. For small apartments, the question arises whether the equipment will fit in the space intended for it.
Choosing a place: in the bathroom or in the kitchen
Most washing machines find refuge in the bathroom. This is the most logical choice of location, as there are usually water pipes and sewers. In addition, household appliances will be hidden from prying eyes.
If there is not enough space in the bathroom, you can think of a connection in the kitchen or even in the corridor.
What you need to pay attention to:
- The floor must withstand vibration.
- You may have to run communications over a distance.
- When measuring distances, possible irregularities of the walls should be taken into account. Just in case, the nominal dimensions of the machine should be at least a centimeter less than the available space.
Water connection
For machine wash, like any other, water is primarily required. The following requirements are made to the water supply system: the pressure in the pipes must be sufficient and the water must be clean. If these conditions are not met, you can put the pressure-boosting pump and filter the water.
In the pipeline it is necessary to build in a separate tap, blocking the water supply to the machine. This greatly reduces the chance of leakage.
Energy supply
 The washing machine has a lot of power. Therefore, electrical cables and sockets available in older apartments are generally not suitable for it.
Floor quality
Serious requirements are imposed on the device floor. First of all, it should be firm and strictly horizontal, without obvious irregularities. In addition, the coating will have to withstand vibration from a rotating drum.
If the floor in the apartment does not meet these conditions, it should be strengthened at the place of installation of the equipment.
Positive air temperature
In the conditions of an apartment the washing machine is always warm. However, in a country private house or technical room possible long-term shutdown of heating. This is completely unacceptable! Water remains always inside the washing machine after washing. In the cold, it will inevitably freeze and tear the hoses or even the pump.
Installation sequence
The new machine, delivered from the store, the first thing you need to free from packaging and shipping fasteners. Then it is connected to all required communications and adjust the height of the legs. After that, the unit is ready for the first wash.
Removing the transport hardware
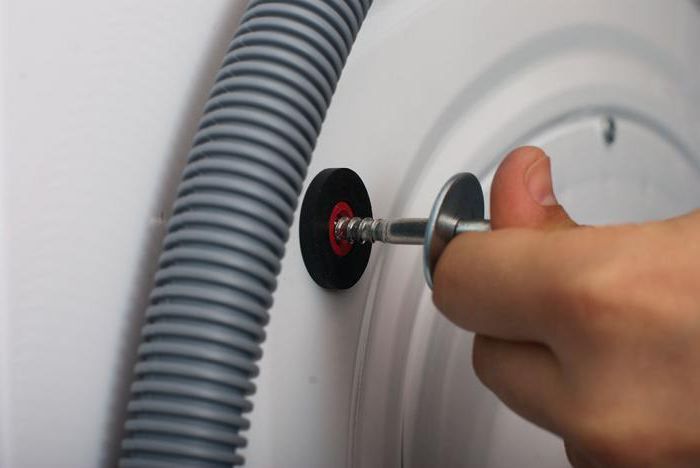 When transporting moving parts are fixed to avoid damage. If you do not remove these fasteners (bolts, brackets, bars), then when you turn on the mechanism will inevitably fail. It is necessary:
- unscrew the bolts;
- remove plastic spreaders;
- take out the staples.
In place of the bolts insert decorative caps that come with the machine.
Water connection
Cold water is supplied through a flexible hose, which is included in the package. It is not recommended to make a completely rigid connection, as through it the vibration will be transmitted to the pipe system and gradually destroy them.
The hose connects to the water supply through a specially embedded pipe or tee. Usually it is equipped with a strainer for cleaning water from coarse contaminants. On the machine side, the connection is made through a standard threaded connection.
Draining
 The easiest way to organize the discharge of water is to lower the end of the drain hose into a bath or sink. But it is rather a temporary solution.
Most often, the waste water is discharged through a special splitter directly into the siphon under the sink. The hose must be long enough to form a slack down loop. In its crook, there is always water that does not allow sewage scent to get into the car.
Leg adjustment
The drum of the machine should rotate smoothly and without distortions. For this, it is necessary that its upper plane is located strictly horizontally. This can be verified using the building level. If the deviation exceeds 2 °, use the adjustment legs of the machine. All modern models have a threaded setting.
Do not put wood or pieces of linoleum under the legs. In the process of washing, they can jump out.
Power supply
The best solution is to connect the machine to the shield using a separate three-core cable, on which the circuit breaker is installed. For protection against short circuit on the case the device of UZO is used.
The socket must be earthed and mounted at a certain height from the floor level so that water does not get into it during leakage. In the kitchen, these requirements correspond to the outlet for the electric stove.
Video instructions on how to install washing machine
Installation features in various conditions
When installing the machine, you need to think in advance about the conditions and mode of its operation. In accordance with this, it is possible to take measures in advance that will help to avoid problems in the future.
In a private house
When building or repairing a private house, it is possible at the design stage to create the necessary layout of pipes and electrical cables. In the presence of a dry basement in the house, washing and drying equipment is often installed there. In this case, the tenants do not interfere with noise, odors and dampness.
In the kitchen and in the hallway
The washing machine fits quite easily into the interior of the kitchen, although the washing process itself is not very well combined with cooking and eating.
In the corridor it should be installed only as a last resort.
In this case, many issues will have to be addressed:
- where to find a place so that the car does not interfere with walking and opening the doors;
- how to hide the laid communications (to the floor, walls);
- how to hide the equipment from the eyes of guests (built-in wardrobe, curtain).
On wooden floor or laminate
 The ideal hard and hard floor for installation is concrete. On wooden floors, the vibration of the machine is amplified and has a destructive effect on the unit itself and the surrounding objects.
There are various options for strengthening the floor:
- to concrete a small foundation;
- arrange a strong podium on the basis of steel pipes;
- at least put an anti-vibration mat.
None of these methods can be compared with a full-fledged concrete screed, but to some extent the unpleasant vibration will decrease.
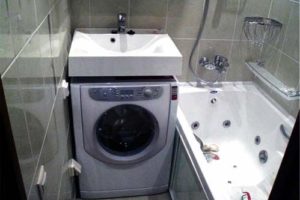
Installing an embedded machine
Embedded appliances perfectly fit into any interior. Its wires and hoses are hidden behind the cabinets, and the front door is fully consistent with the rest of the headset. At the same time, such a technique is more expensive than a free-standing one and its choice is not so great.
Therefore, the question often arises, is it possible to build in an ordinary automatic machine? It is possible, and, moreover, in various ways:
- just hide under the tabletop;
- install a compact model in the finished kitchen cabinet;
- independently make a suitable locker, with or without a door.
You need to pay attention to the hardness of the base, so that the vibration is not transmitted to neighboring cabinets.
Installing a washing machine above the toilet
Given the small size of most toilets, the idea to build a washing machine there seems strange. But some enthusiasts manage to make this adventure.
Of course, you should pay attention to security measures, so that the unit does not fall on your head at a crucial moment.
- The quality of the walls. If the walls are brittle, you need to make a steel structure with a floor support.
- Sturdy suspended shelf. Made of solid metal profile.
- Safety side so that the machine does not slip from the shelf from vibration.
- Retractable shelf so that removable laundry does not fall into the toilet.
- The height of the attachment should allow access to the toilet flush button.
It is better to place the car behind the toilet, and not directly above it. It is logical to choose a model with a minimum depth. And remember that to repair heavy equipment will have to be removed from the shelf, and then again put back.
Why the car "jumps" and how to deal with it
 Increased vibration is characteristic of newly installed machines. But sometimes the time-tested technique begins to bounce or even move along the floor. It is necessary to determine the causes of this behavior of the machine, until it is completely out of order.
The following options are possible:
- Before installation, the fasteners - bolts, brackets were not removed.
- The floor is not even, the machine is swinging.
- On the contrary, the floor is too smooth and slippery, then you can put a rubber mat on it.
The most easily eliminated problem - raw linen coiled inside the drum in a single room. The machine needs to be stopped, hands to distribute the laundry inside it and continue spinning.
Factors that are of a technical nature are also possible. Only a repairman will be able to identify and eliminate them:
- Damaged shock absorbers.
- Worn springs, which is attached to the tank.
- Loose mounting the counterweight.
- Bearing collapsed.
All these reasons are subject to immediate elimination, the operation of the machine with such defects will inevitably lead to its breakdown.
The quality of the installation of the washing machine depends not only on the connection of the equipment itself, but also on the choice of the installation location. To properly assess the situation, take advantage of its benefits and compensate for the negative moments is quite possible for any person. In the presence of communications, the installation process itself takes not so much time. At the end it is necessary to carry out a test run - washing in an empty machine without laundry. If no extraneous noise is detected, the machine can be used.
After purchasing a washing machine, most buyers are not too serious about the installation of such equipment. The process of installing and connecting washing machines involves several steps. You can install according to the instructions to the washing machine. But do not forget that non-compliance or violation of at least one of the stages threatens with both a quick breakdown of the equipment and the danger associated with electricity or flooding of the whole apartment.
Consult we have: 8 (495) 320-33-35
Whether you buy a new appliance or just transport an old one, a professional should connect a washing machine. RusMaster specialists will quickly and efficiently perform the full range of services necessary for the proper operation of your typewriter. Trusting in a professional master, you not only extend the life of the washing equipment, but also be able to avoid the many risks associated with self-installation.
Why is RusMaster the best choice?
Why it is worth ordering installation from us?
Making an order for the installation of a washing machine in "RusMaster", you get the following advantages:
- Warranty proper connection.
The installation is performed by a specialist with extensive experience in this field. All communications are connected in strict accordance with safety regulations. - Flawless work result. The specialist will take into account all the features of communications in your apartment and install the machine exactly where it will be convenient for you.
- Price washing machine connection is quite affordable. This is the cost of your peace of mind and confidence in the correct connection and, as a result, reliable operation of the equipment.
What you need to do before connecting the washing machine?
 Instructions to any washing machine makes the main requirement for the power grid - it must be earthed. It concerns how self install, and the work of the master. After all, if washer connected to the network without grounding, then warranty repair is excluded. Even if you are not installing a new technique, this condition is mandatory.
Install and connect the washer for 650 rubles.
One of the reasons for taking care of grounding is the high risk of injury from electric shock in its absence. Also, equipment electronics can fail even from a minor effect of statics. This is an absolutely unjustified risk that threatens to incur enormous costs for the repair of equipment or even for the purchase of new equipment. The work of the washing machine is associated with the proximity of absolutely incompatible "phenomena" - water and electricity. Therefore, it is important to protect yourself and equipment.
How to connect a washing machine?
Before you buy a washing machine, you should choose the place where you need to put it. The standard is the installation in the bathroom, but more and more equipment placed in the kitchen. Usually this choice is made for reasons of saving free space. In old houses, the bathrooms are too small, and in the kitchen it is much easier to find an empty seat. In this case, the communication is not difficult to stretch. 
Order in one click
Initially, make measurements of the place where you plan to install the machine. It is important to measure the distance on the floor and height, because the indicators may vary due to the irregularities of the wall. Remember that the machine should not stand close to the wall or furniture. Leave small gaps.
It is important that the hose of the washing machine does not exceed 1.5 meters in length, as this will create an additional load on the water pump.
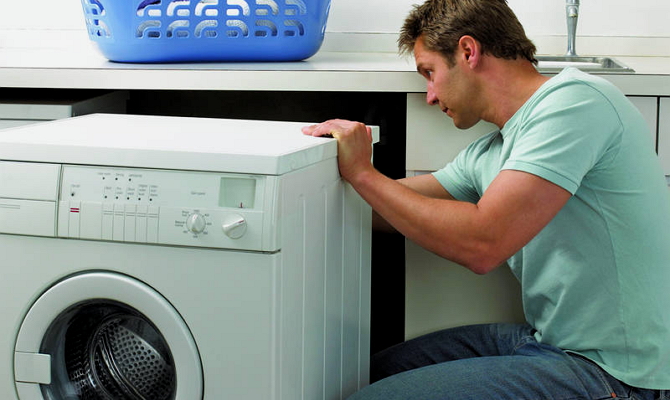
Stage 1. Unpacking and preparation for installation After receiving the washing machine is recommended to carefully inspect the purchase for the absence of external and internal damage. If you notice any scratches or dents on the case, then you need to contact the company-seller to replace the washing machine. By inspection should be taken very carefully, because you buy a home "assistant" for many years!
![]()
After inspection, remove all fasteners used during transport. After that, the holes are closed with special plugs.
Stage 2. Install the washing machine in place, ensuring a flat surface. The stable position of the machine eliminates vibration during its operation. Excessive vibration wears out the washing machine's motor and other internal modules. Ensure that the equipment is strictly upright by twisting the supports. Try to install the washing machine on a hard, preferably concrete floor, so that it does not go and “play” on the surface.
Stage 3. Water supply As a rule, a cold water supply pipe is inserted into the pipe and a crane is installed. Then the washing machine hose is connected directly to the tap. If a tie-in is impossible for any reason, you can install a tee with a faucet through the front of the toilet bowl or just in front of the mixer.

Stage 4. Providing a drain system. The water used by the washing machine needs to be drained somewhere. The system must be reliable in order to avoid flooding the entire apartment or even neighbors below. The easiest way is to fix the drain hose to the side of the bathroom or sink. But this method is not very reliable, and the design has an unpresentable look. It is better to attach a drain hose to a special siphon or tee, embedded directly into sewer pipes and.
Stage 5. Connecting equipment to the mains. Power supply of the washing machine should be carried out only through the euro socket with the grounding contact. Be sure to contact an electrician who must also draw a separate line from the electrical panel. All this is necessary for stable and reliable work of equipment.
Stage 6. Check. After installation, a test run of an empty machine without laundry is carried out. The purpose of the test run is to determine if all the washing and draining steps are occurring correctly.
Proper connection of the washing machine is accompanied by many nuances that are known only to professional craftsmen. Our experts will help you to equip a place for a washing machine, make installation work and connect the washing machine, the price will depend on the amount of work.
Save time and trust your work. real specialists. Then your washing machine will last more than one year!