Antenna input for Samsung TV. Antenna broke on the TV: what to do
As it sometimes happens, over time, the antenna socket of the TV has fallen into disrepair. No matter which model and company - they all have the same nests, calculated under the model antenna plug.
At the same time, the device is in good condition, there is an image and sound, and if you move it from time to time - correct the plug antenna cable, it is still possible to watch. Well, do not drag the same TV with such chepuhovoy problem in the studio. Moreover, the tuner will be changed, but not the nest on it. Is there an identical one? Just soon, that is not. Once, about three years ago, I tried to fix this case, to restore the broken connection of the socket with the PCB, by soldering. Immediately after the repair, there was an improvement, but after a while everything became as before. Constant antenna swapping (half of the programs come from one, half from the other) when the core is broken, leads to contact violation of the plug - tuner board. It became clear - you need to change the central contact of the plug. This time I went to repair seriously. I found a suitable "donor" and removed the necessary "organ", at the same time I recognized its device and method of attachment.
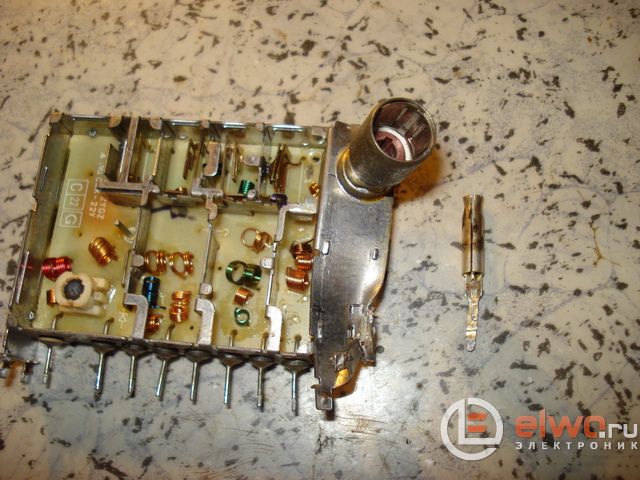
There was a plan of action. Started to implement it. The tuner with the socket on the photo is on the extreme right. It is not at all easy to remove the side walls from it (components that stand nearby), but it is possible. The main thing is not to hurry.

Immediately before removing the faulty part of the plug, it was once again carefully looked at its device. In the middle of it there is a limb - a mount (in the photo is new and old for clarity together, the limb is clearly visible on the old one).
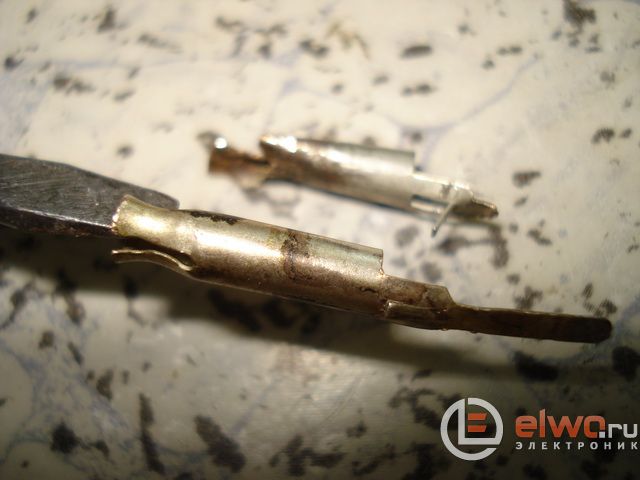
It is clear that until the limb is returned to its original position (pressed against the base), the central part cannot be removed from the installation site.
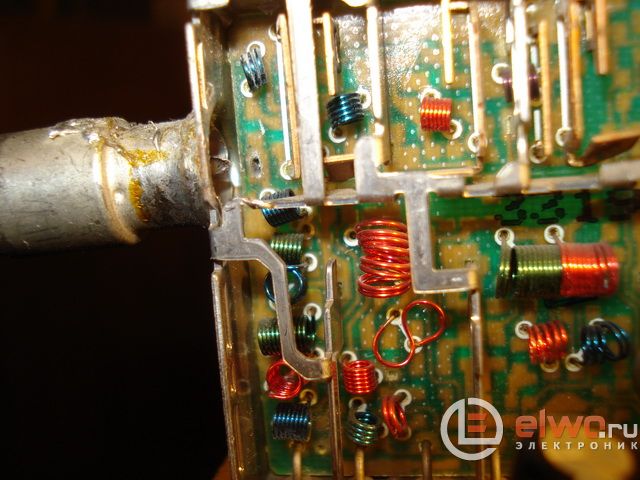
On the right side of the tuner, with small side cutters, I had a bite between the connection of the central part with the board and dropped out. I took a paper clip, straightened it, and with one end I sharpened it under a screwdriver. In his left hand, the surgical clip holds a removable chip, in the right clip, while curving and twisting, he tries to press the limb. Everything worked out.
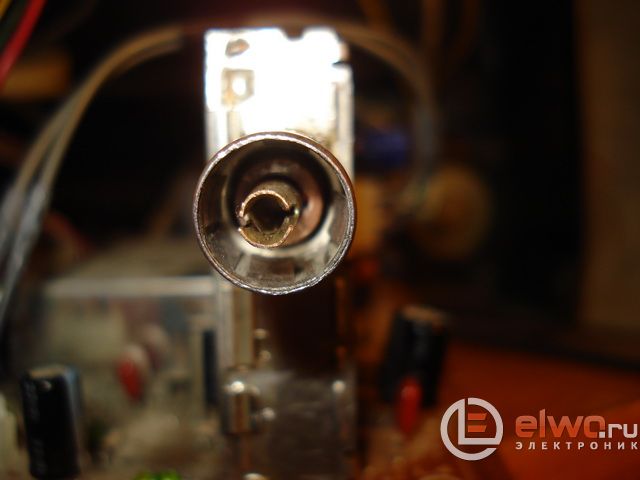
I insert the "donor organ". I bend its shank to the tuner board and insert it on the other side of the tuner into the board and solder the conductor (a fat output from a faulty diode).

I return to the right side and solder the bent shank and guide from the board. So it will be easier than just shank solder to the board.
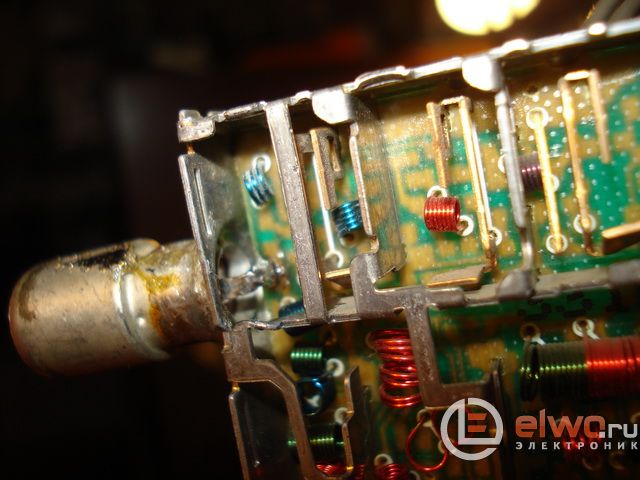
I put in place the side walls of the tuner.

Over the past three years after the last cleaning, dust has accumulated enough. Armed with an art brush, removed a significant part of it.

I set in place the board and disconnected wires, collect the case. The cable plug enters the socket with a bit of pressure - thoroughly. Turn on.
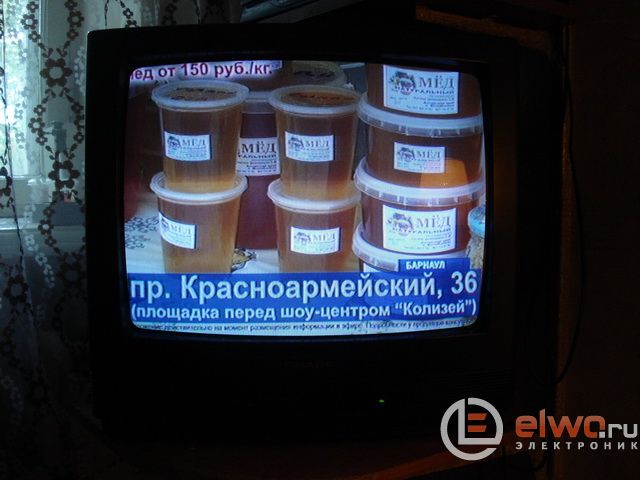
Here it is successfully hit! You can and medka, and although medovushki. Deserved. I wish you success, Babay.
As it sometimes happens, over time, the antenna socket of the TV has fallen into disrepair. No matter what model and company - they all have the same nests, designed for a typical antenna plug.
At the same time, the device is intact, there is an image and sound, and if you move it from time to time, you can correct the plug of the antenna cable, then you can still watch it. Well, do not drag the same TV with such chepuhovoy problem in the studio. Moreover, the tuner will be changed, but not the nest on it. Is there an identical one? Just soon, that is not. Once, about three years ago, I tried to fix this case, to restore the broken connection of the socket with the PCB, by soldering. Immediately after the repair, there was an improvement, but after a while everything became as before. Constant antenna swapping (half of the programs come from one, half from the other) when the core is broken, leads to contact violation of the plug - tuner board. It became clear - you need to change the central contact of the plug. This time I went to repair seriously. I found a suitable "donor" and removed the necessary "organ", at the same time I recognized its device and method of attachment.

There was a plan of action. Started to implement it. The tuner with the socket on the photo is on the extreme right. It is not at all easy to remove the side walls from it (components that stand nearby), but it is possible. The main thing is not to hurry.

Immediately before removing the faulty part of the plug, it was once again carefully looked at its device. In the middle of it there is a limb - a mount (in the photo is new and old for clarity together, the limb is clearly visible on the old one).

It is clear that until the limb is returned to its original position (pressed against the base), the central part cannot be removed from the installation site.

On the right side of the tuner, with small side cutters, I had a bite between the connection of the central part with the board and dropped out. I took a paper clip, straightened it, and with one end I sharpened it under a screwdriver. In his left hand, the surgical clip holds a removable chip, in the right clip, while curving and twisting, he tries to press the limb. Everything worked out.

I insert the "donor organ". I bend its shank to the tuner board and insert it on the other side of the tuner into the board and solder the conductor (a fat output from a faulty diode).

I return to the right side and solder the bent shank and guide from the board. So it will be easier than just shank solder to the board.

I put in place the side walls of the tuner.

Over the past three years after the last cleaning, dust has accumulated enough. Armed with an art brush, removed a significant part of it.

I set in place the board and disconnected wires, collect the case. The cable plug enters the socket with a bit of pressure - thoroughly. Turn on.

Here it is successfully hit! You can and medka, and although medovushki. Deserved. I wish you success, Babay.
Antennas with an amplifier use the same love among the people. Although I am personally convinced that in most cases, the amplifier is completely unnecessary, it only adds hassle. I already, but today I want to draw attention to another problem.
Do you know how very simple it is to break a TV just by connecting an antenna with an amplifier to it? Perhaps you yourself have become a victim of this, or will soon become, if you do not take action.
By virtue of my work, I have repeatedly watched how people thoughtlessly make one and the same simple mistake and another broken TV that came in for repair pushed me to write this note.
How not to break the TV by connecting an antenna with an amplifier
The screens of modern televisions are becoming more and more, while the TVs themselves are thinner. And because of this, in some TV models the antenna input is positioned so that the plug of the active antenna is inserted into it, the whole problem. Let's figure out why!
The fact is that the plug for an antenna with an amplifier is often combined with a separator and therefore has certain dimensions, it is much larger than an ordinary plug. See the figure below if you do not know what it is about.
And now let's see how these plugs will enter the antenna jack of the LCD TV in which the antenna input is not in the back, but in the side. With a regular plug, everything is fine!
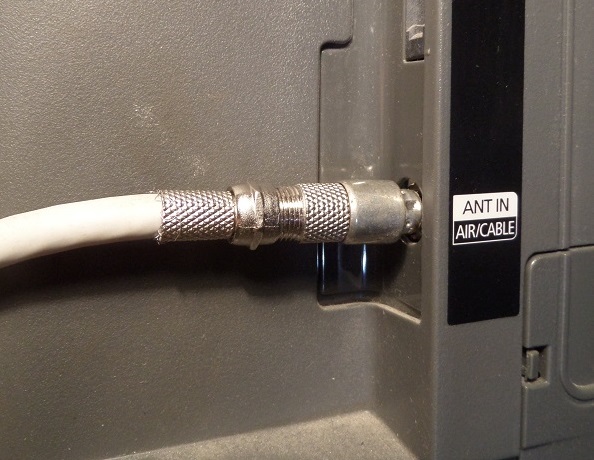
But with a separator, it enters with difficulty, because as a separator is tight, it rests against the body of the TV and therefore, in order to insert it there, it is necessary to apply efforts. And further, the case presses so that it seeks to break the nest of the TV.
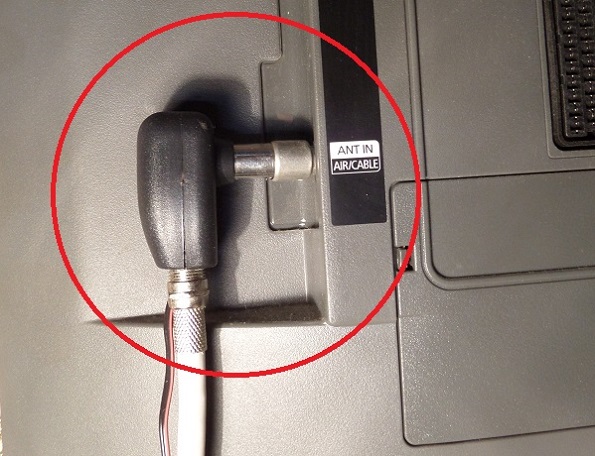
This breaking out may not happen immediately, at first the socket will start to dangle, the signal will sometimes disappear. Then the owners themselves begin to pull the plug to return the picture. So gradually break through to the end.
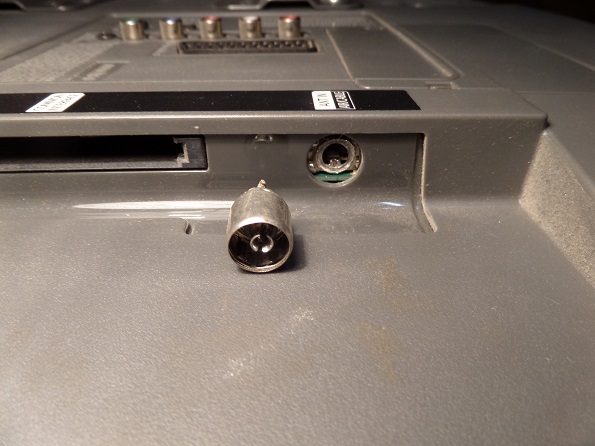 Tuner with a torn "tail"
 Further, users have a very wrong opinion. The pier has come off "Tail" needs to be soldered and that's it! - Yes, I will do everything myself now! I have a soldering iron somewhere in the barn lying around! Guys, stop! You got a serious repair. In the old Soviet televisions, it was possible to change only the jack and everything, and in modern ones this jack is part of the TV tuner.
And the tuner of a modern LCD TV is such a metal box, in which you can (but do not have to) pick it up with a needle, and not with a 40-watt soldering iron.
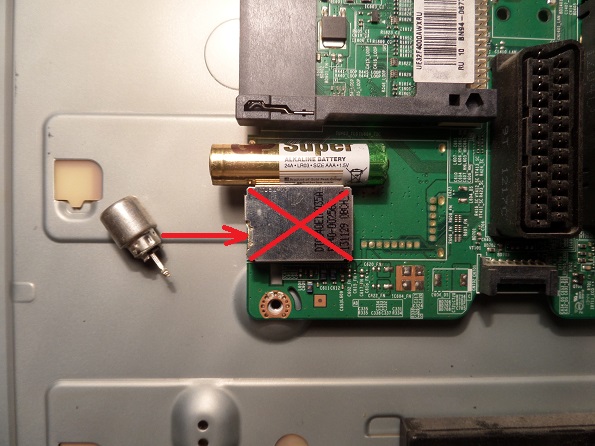 This is the size of the tuner in comparison with the "mizinchikovoy" battery.
 In general, everything is not so simple, of course, masters can restore a broken tuner, but this is on condition that they “successfully broke off” and did not try to repair it themselves. But it also happens that the replacement of the entire tuner is required, and this is a completely different money!
How to avoid tuner failure with antenna plug
To avoid all this trouble is quite simple. To do this, you just need to purchase a TV extension cable of small length. 1-1.5 meters is more than enough. An extension cord is a wire at one end of which is the socket, and at the other plug.
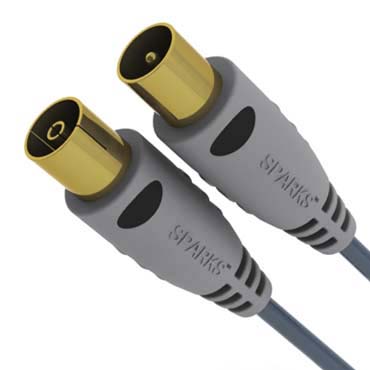
The problem can only be with the acquisition of such an extension cord, they are not always commercially available. But this, too, is easily solved; such an extension cord can also be constructed by yourself.
It will take: a segment of the TV cable of the desired length, a socket and a plug with F-connectors. That's how they look.

Now we are installing this whole economy on a cable and extension cord is ready.
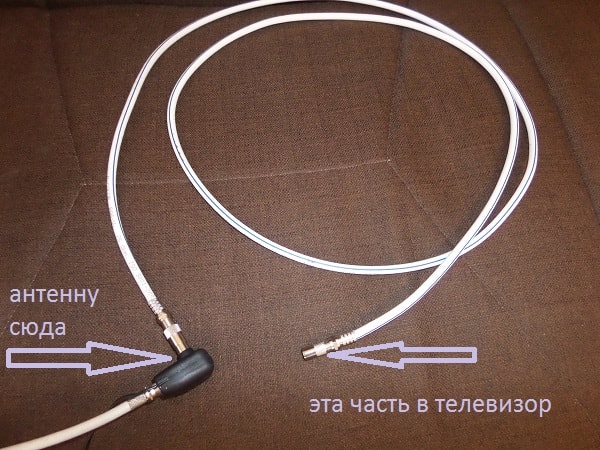
Of course, there is also a backup option, this is in case the nest is already torn off or loose, and you don’t particularly want to repair or are expensive.
In this case, you can purchase an external tuner for DVB-T2 - This is a terrestrial format digital television. Connect this tuner to your TV, for example via hDMI cableand watch tv through it.
I hope this information is useful to you. And the best thanks to the author for sharing a note by clicking on the buttons of social networks, and leave a review. Thank!
We have extensive experience in the repair and replacement of antenna inputs, regardless of the TV model. If necessary, our masters will professionally perform diagnostics, tuning, installation and repair of antenna equipment of any type and purpose.
With the loss of the TV signal or the deterioration of the image quality, the need arises to diagnose antenna equipment. If the fault is not detected, you need to check the antenna jack of the TV. Loss of contact in the connector can be caused by damage to the socket during operation. To diagnose the connector, you need to shake the cable-to-TV connection. If, while staggering, it is possible to catch the signal, the antenna input of the TV is damaged.
Solve a similar problem in modern tvs There are two ways: by replacing the tuner or by soldering the antenna input. When replacing, a video tuner is installed that matches the specific TV model. It’s not always possible to choose a suitable tuner, so there is an alternative, affordable and economical option - soldering the socket to the TV tuner.
Replacing the tuner or soldering the antenna input is the work of a professional telemaster. We have extensive experience in doing such work. Our masters will quickly and efficiently repair the antenna input. If necessary, we will help determine the choice of a suitable model of the tuner and perform its replacement. The price of our services is the lowest in Moscow and the near Moscow suburbs.


