How to repair a hairdryer with your own hands
Repair of any hair dryer begins with its complete or partial disassembly, but before we start this process, let's find the answer to the above question.
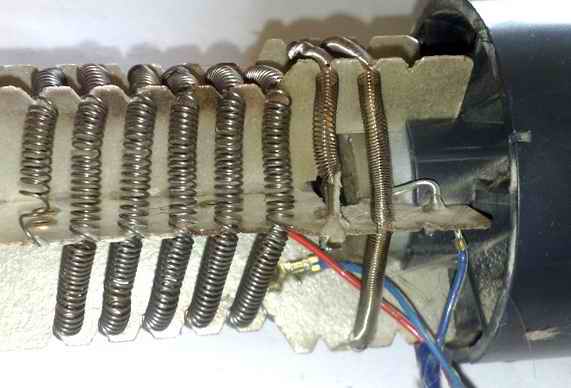
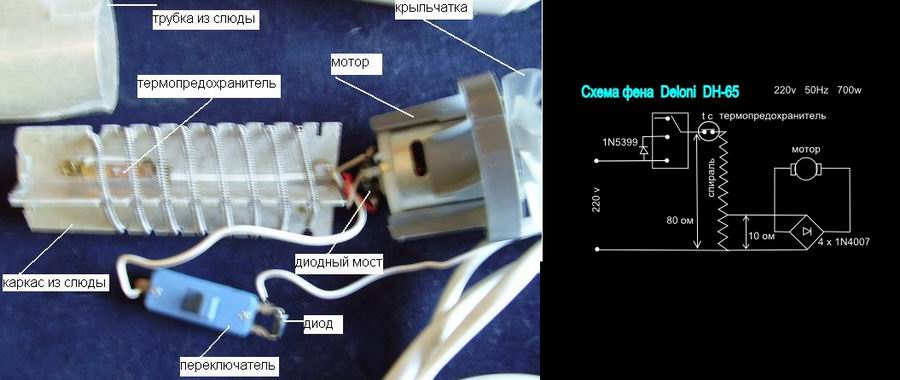
Absolutely any hair dryer can be divided into two main elements - a heating element and an electric motor. The heating element is usually a nichrome spiral, it is she who heats the air. And DC motors generate warm, directional airflow.
Electric motors in hair dryers are 12, 24 and 36 Volt, but sometimes 220 Volt electric motors are found in very cheap Chinese models. A propeller is attached to the rotor of the engine, which ensures the removal of warm air from the spiral. The power of the hair dryer varies from the thickness of the spiral and the power of the electric motor.
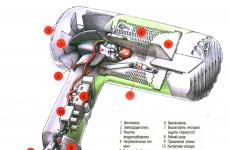
Let's consider the design of the hair dryer in more detail:
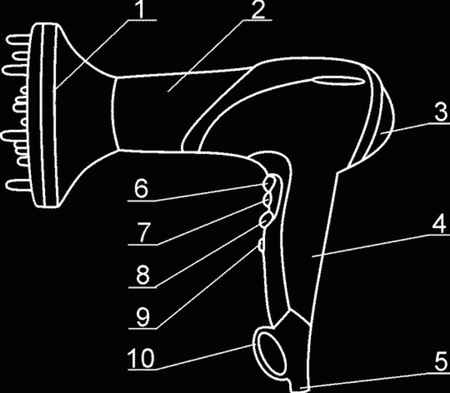
1 - nozzle-diffuser, 2 - body, 3 - air duct, 4 - handle, 5 - cord twist protection, 6 - "Cold air" mode button, 7 - air flow temperature switch, 8 - air flow rate switch, 9 - Turbo mode button - maximum air flow, 10 - hair dryer hanging loop.
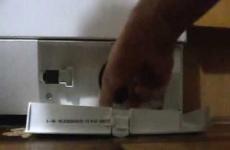
The body of the hair dryer consists of two plastic halves, a front and back ring and a mesh. The mesh hemisphere is dismantled by slightly turning it counterclockwise. The hardest part is to pull out the back ring where the power cord enters the base. This ring has lugs with holes and latches. The front ring is removable, although it is a little easier, it also has two retainers on the body halves and recesses in the ring (in the photo below, only one protrusion is clearly visible and the ring is worn before it).
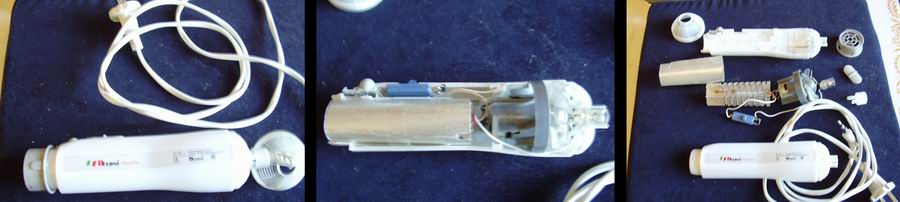
the main elements of the hair dryer and the diagram in the photos below:
Rowenta cv8525 hair dryer works, but does not heat the air |
Hair dryer Rowenta repair and disassembly: First, the front metal ring is removed, then the rear mesh hides two self-tapping screws under it, unscrew them and remove the rear cover from the handle (on latches). There are five self-tapping screws under the cover, unscrew them.
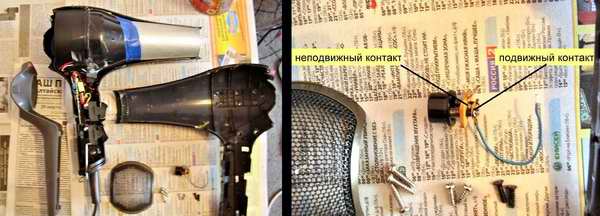
Inspection revealed a classic contact violation in the button that turns off the heating of the air. The contact moved a little and stopped closing the heating circuit of the spiral. The repair boiled down to the correct setting of the contact position and melting the top of the plastic rack with an ordinary soldering iron
Dismantling and repair of the Remington hair dryer |
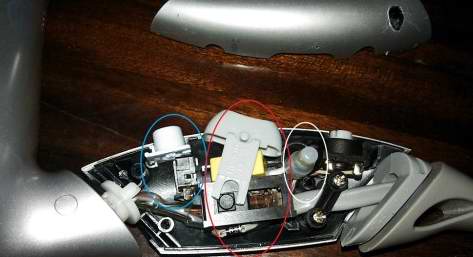
Instability of work. The hairdryer was switched off periodically. First you need to remove the plugs on the handle of the hair dryer. You can remove the plugs with a sewing needle or the sharp end of a thin knife.
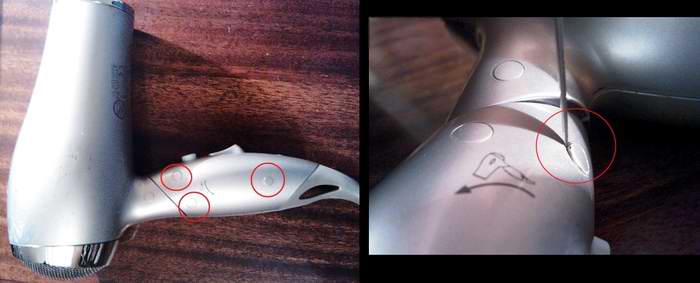
Under the plugs there are screws for a special U-shaped screwdriver. After disassembling the handle, we see - the switch for the supply of warm air (blue), the power switch of the hair dryer (red). Here you need to carefully inspect everything in case of a very probable breakage of conductors or melting on the switches.