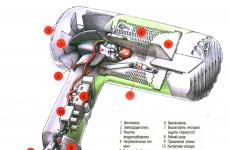
Remington hair dryer disassembly and repair
The other day, my irresistible, unique and intimate Wife began to complain that her beloved the Remington hair dryer does not work... This manifested itself as interruptions in normal operation depending on the position of the power cable. That is, if the cable is pulled, the hair dryer turns off; if you press it against the hair dryer, warm air starts to flow. I immediately realized what was happening and began to tear off my shirt and wave my favorite soldering iron - they say, let me disassemble and repair the hair dryer right here and right now.
In general, after a short groan, my screwdrivers clashed with her hairdryer in an epic battle before the first ... soldering. I will say right away - this instruction can be used for most hair dryers from Rowenta, Braun, Philips, Bosch and Scarlett... Of course, all hair dryers are disassembled in different ways, but the principle of the device is the same. Go.
Remington hair dryer disassembly
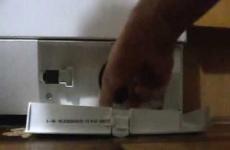
First you need remove the plugs on the handle or all over the body of your favorite hair dryer. In my case, these are three plugs on the handle of the hair dryer. Recently, it has become fashionable to make the case of a hair dryer on snaps or even to fuse the two halves together.
The latches can be defeated, but if the halves are soldered, then only cut along the seam, and then glue it with epoxy, in general, is unpromising. So when buying a hair dryer for your beloved, pay attention to its design.
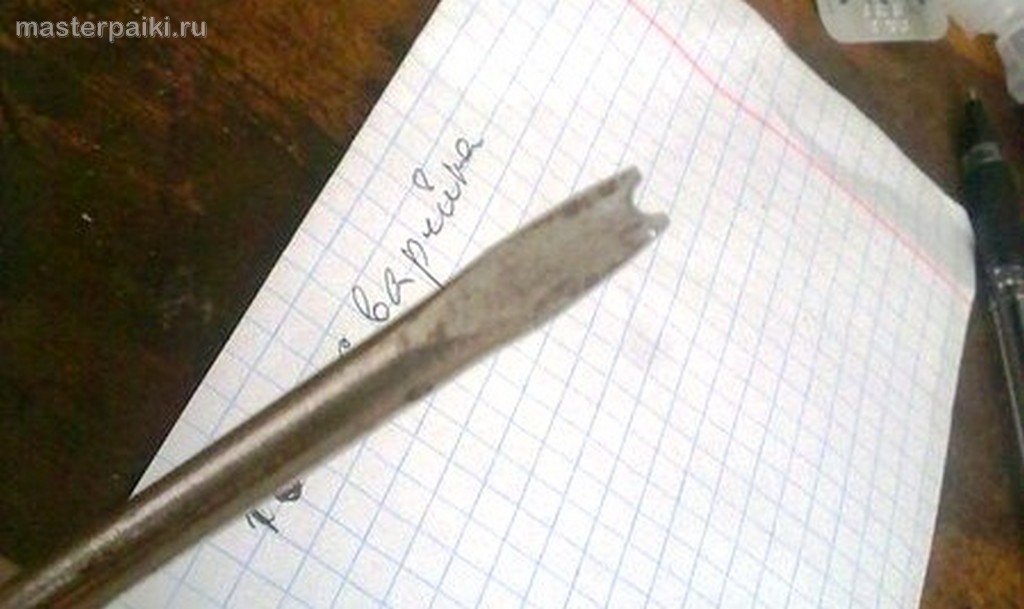
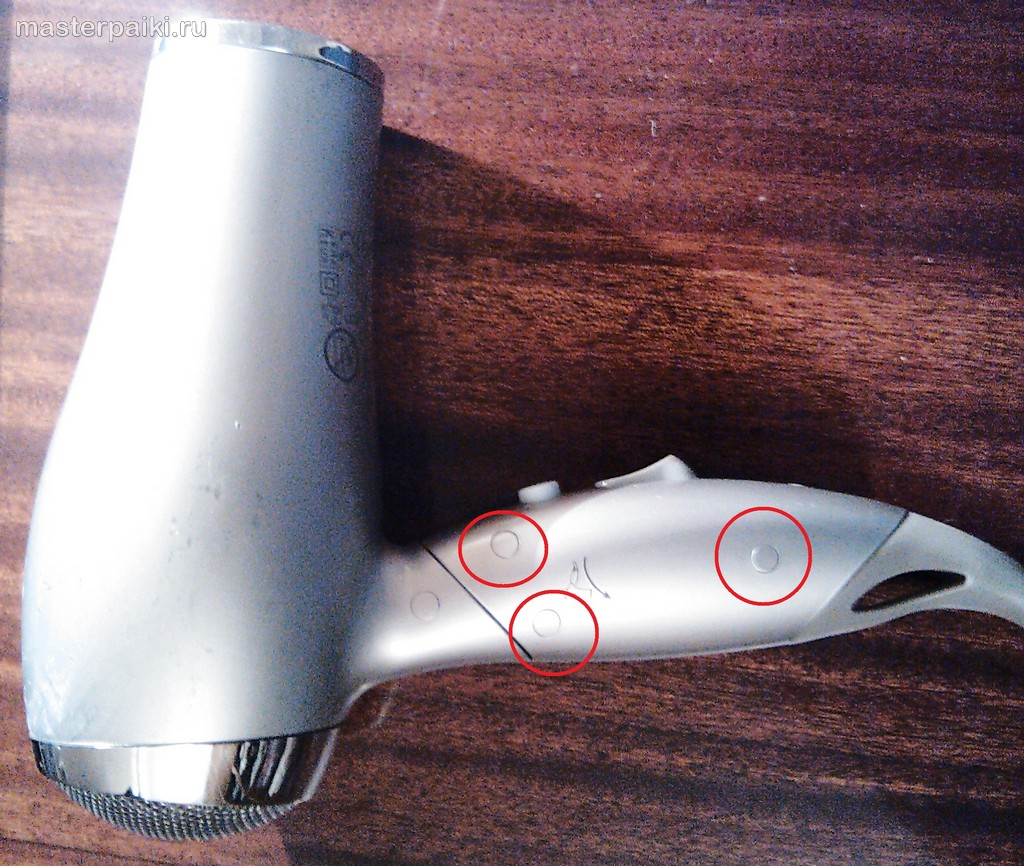 It is convenient to remove the plugs with a needle or sharp thin knife... Be prepared for the plastic to bend around and immediately warn your Wife about this. The problem with burrs on the plastic can be solved at the end of the repair using the same knife.
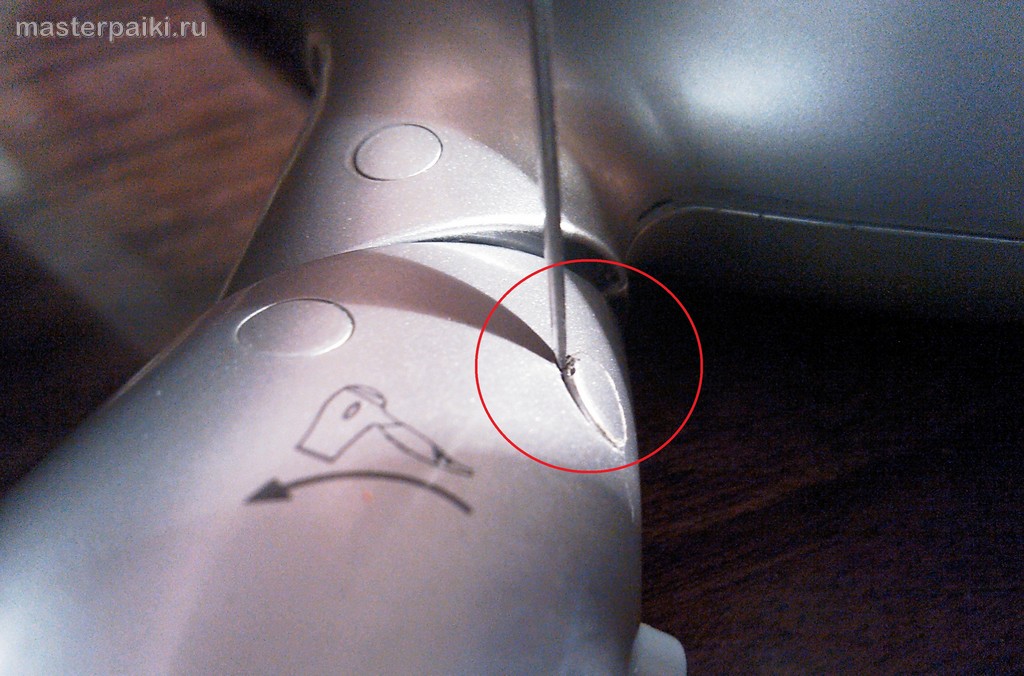 Under the plugs I found U-screwdriver screws as in the photo. In general, such screws were invented against vandals for outdoor equipment and to protect technology from curious children. They are called Security.
Such screws, only larger and with round holes, are in my house in an elevator. It's good that I had the right two-bit bit just for these screws. Okay, elevator, just try to get stuck between floors one more time.
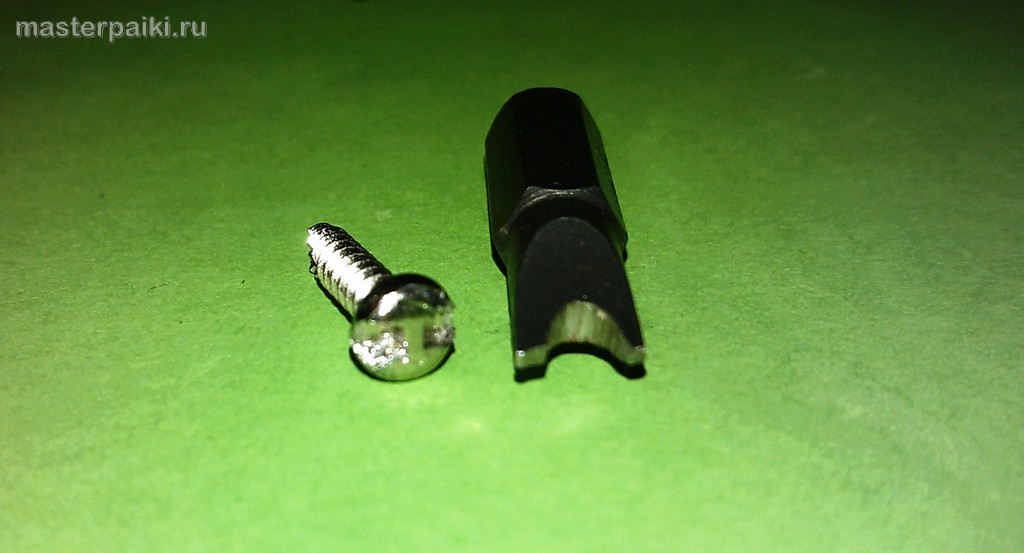 If you do not have such a screwdriver, then you can make a U-shaped screwdriver from an old slotted screwdriver by simply making a cut in it with a hacksaw.
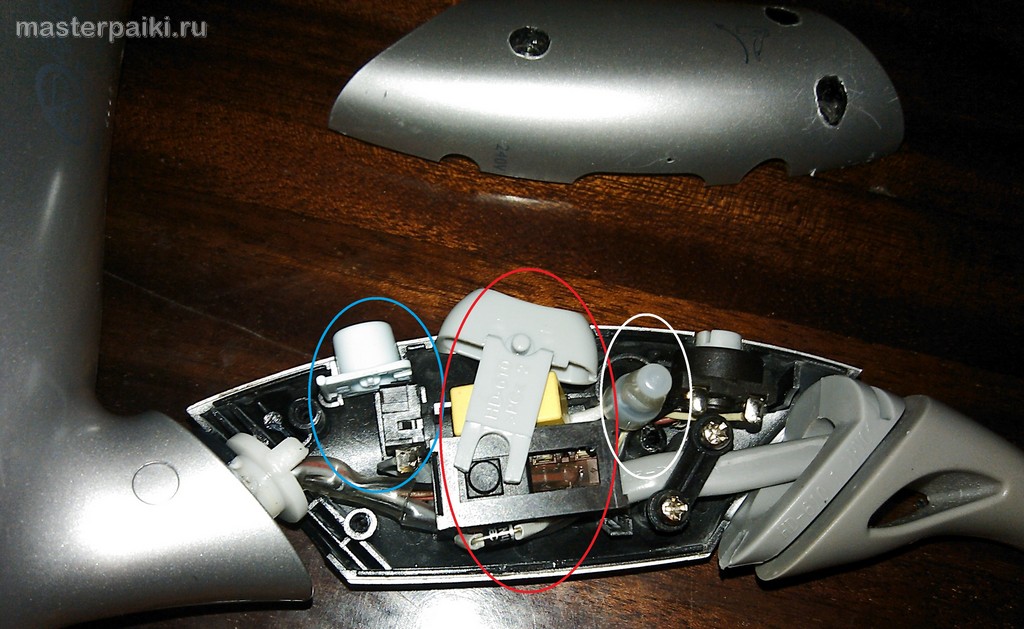
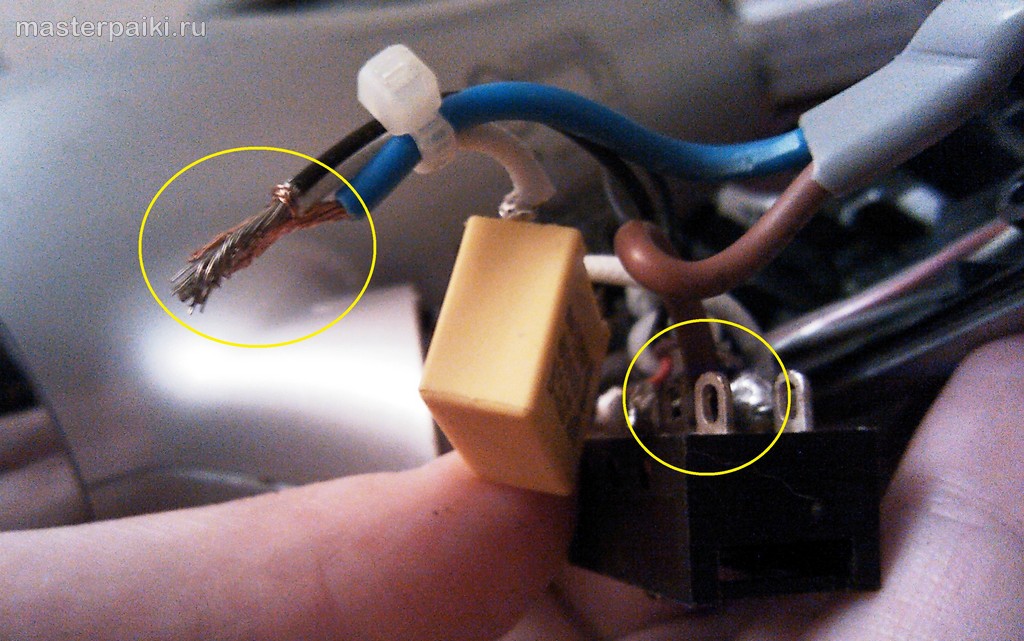
 After disassembling the handle of the hair dryer, we see the picture as in the photo - the hot air supply switch (blue), the power mode switch of the hair dryer (red), twisting wires 220 V.
Everything is attentive here inspecting for a cliff any wire or burn marks, melting on the switches.
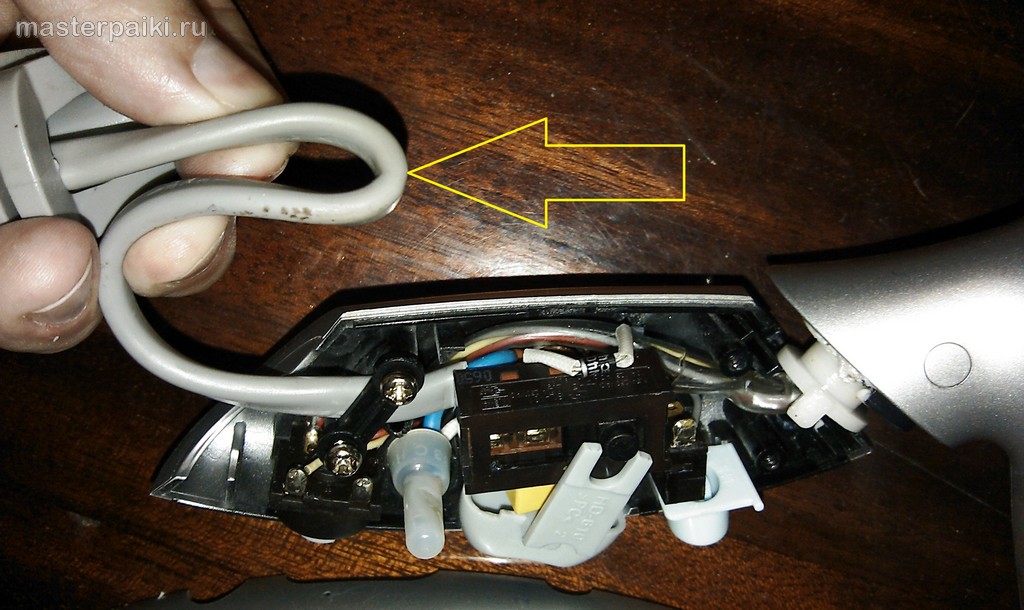
 If everything is in order here, then unscrew the two screws of the wire holder at the very bottom of the hair dryer handle. Necessary find a broken wire- usually it is located near the exit of the wire from the handle of the hair dryer.
Such a weak point is immediately visible if you bend the wire in half.
Hair Dryer Repair Remington
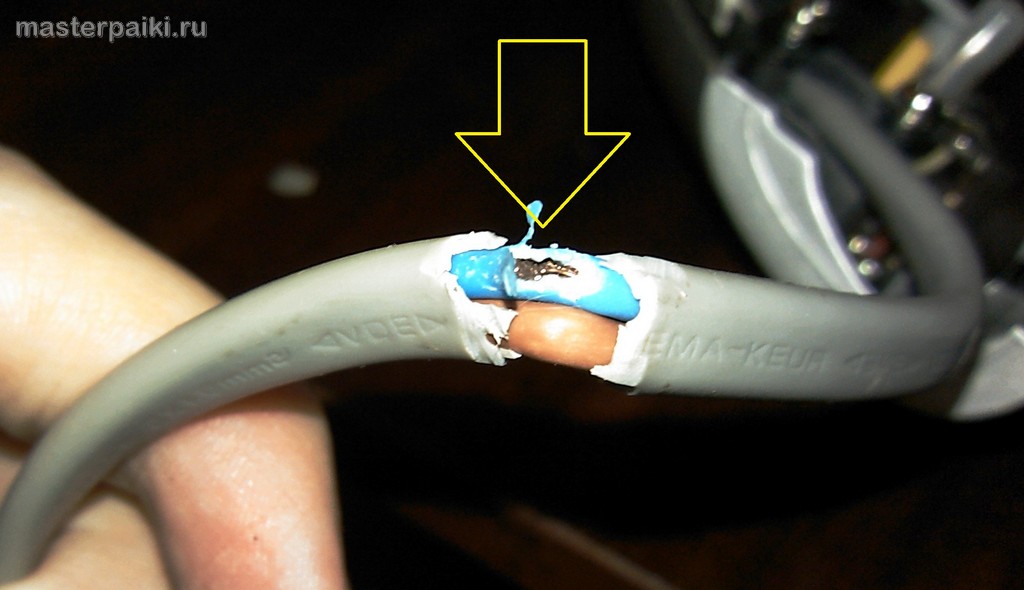
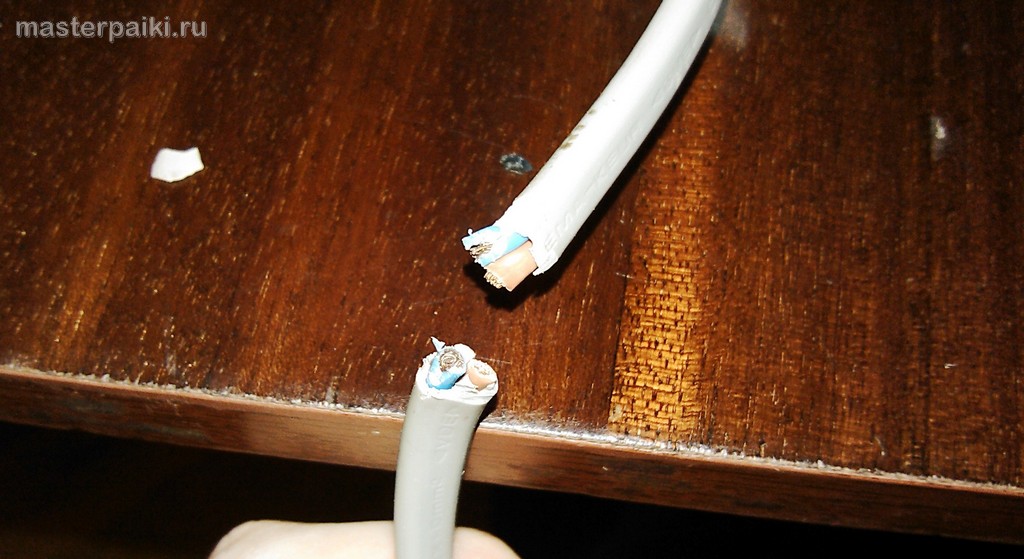
 For check we clean the braiding of the power cable in the place of inflection and we see burnt copper wires.
 Boldly cut the wire and prepare it for installation.
 One piece of cable I had to unsolder from switch the power of the hair dryer, and the second free from twist with yellow capacitor contact and black wire.
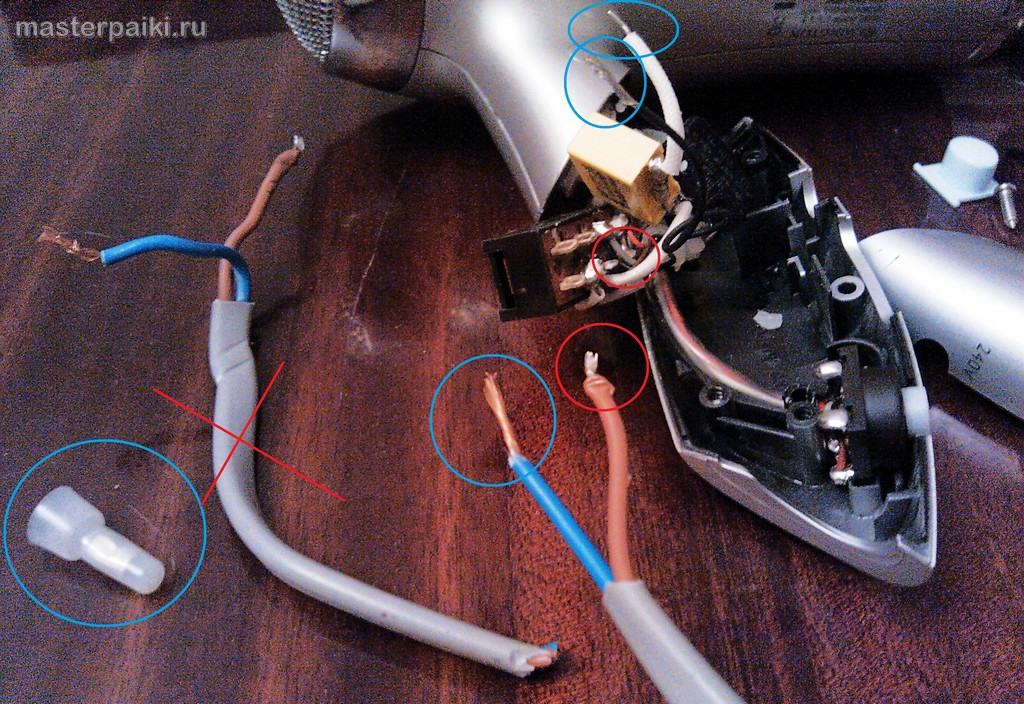
 Then I prepared one end of the cable for twisting (blue wire) and the other end (brown wire). In general, the color of the wire in the power cable is not important, since they can be swapped. We mount each wire in its place and put all the insides in the corresponding grooves. Install the handle body back and fasten it with screws.
I have selected similar screws for a Phillips screwdriver, so next time there will be no problems with disassembly. We put in place the screw caps. If there are burrs on the plastic after disassembling the hair dryer, then you can cut them off with a sharp scalpel or flatten them by pushing on them.
 This completes the disassembly and repair of the hair dryer for your beloved wife. I convey my regards and declarations of love to her. You are the best for me in the whole world!
The Solder Master is mentally with you - successful repairs!