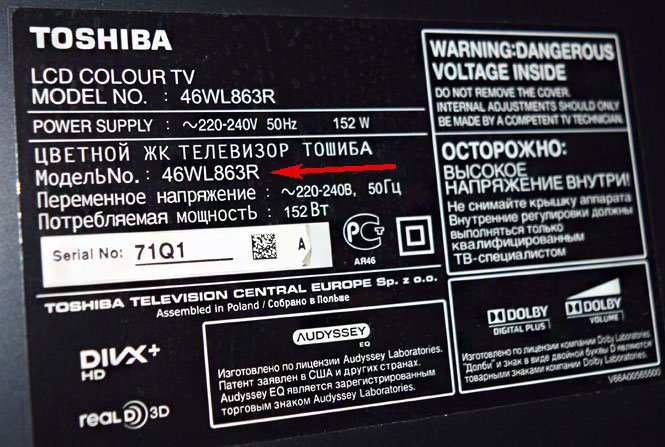
Tv toshiba is configured for only one program. Setting up digital channels on Toshiba TVs
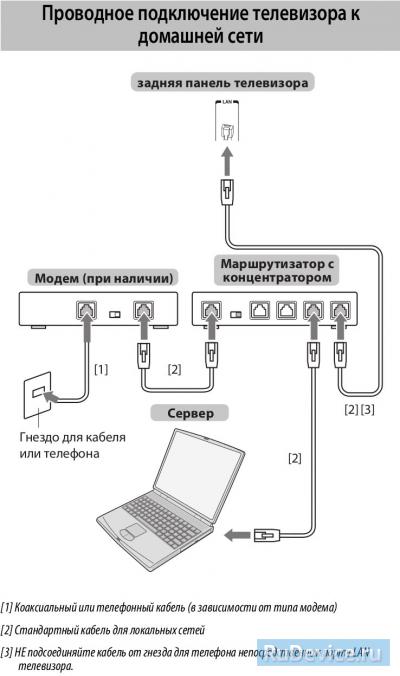
If you use a hub or switch to connect the TV to your home network, you will not be able to use automatic configuration, and you need to configure the network address manually. When using a router with built-in DHCP support, use the automatic configuration. Manual tuning may not be possible. Directly use a cross-over network cable when connecting the TV to the PC.
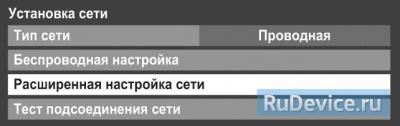
First you need to select the type of network to connect to. To do this, go to the Settings menu; → Preferences; → Network installation; → select Network type; and then the value is Wired; and Wireless;
If the dual-band wireless LAN adapter is not connected, the wireless network can not be selected.
Wired connection (LAN)
On the router connected to such a TV, you should usually set to set for the parameter Auto-tuning; the value is On;
If the DHCP function of the router is turned off, set the AutoSetup option; Off; and enter the IP address manually.
Setting the IP address
When manually entering an IP address, you must ensure that it does not match the IP address of any other element of the network - it must be internal and unique to the TV.
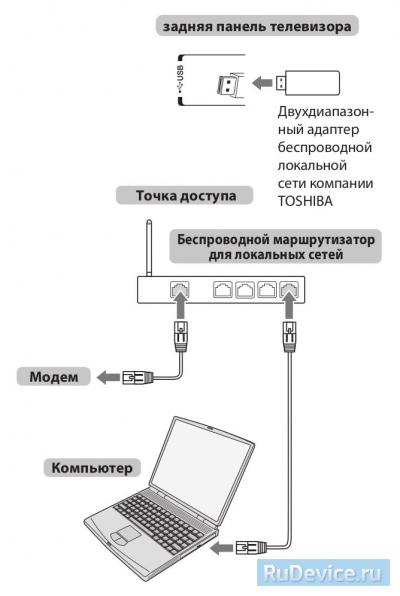
Wireless connection (WiFi)
If your access point supports WPS, you can use this method.
WPS is an industry standard designed to facilitate the connection of wireless network devices and security settings.
When using WPS, all wireless settings are automatically configured. Note that WEP encryption may not be available for configuration with a simple setup.
There are several ways to wirelessly configure:

- Simple setup using PBC (setting by pressing the button).
- Choose the point PBC; and then press the OK button., and then press the OK button.
- Follow the on-screen instructions and click the corresponding button on the access point.
- When the window with the notification of the completion of the setting appears, click OK ;.
- Easy setup with PIN code (personal identification number).
- In the Preferences menu; go to Setting up a network; → Wireless tuning; → Easy setup;
- Select PIN; and then press the OK button., and then press the OK button.
- When the PIN code window appears, enter the displayed PIN code in the access point settings, and then press NEXT ;, to continue the setting using the PIN code. When the message with the notification of the completion of the setting appears, click OK ;.
- Auxiliary setting
- In the Preferences menu; go to Setting up a network; → Wireless tuning; → Auxiliary setting ;.
- Use the arrow buttons to select the desired access point and press OK ;.
- Highlight the Security key; and click OK ;. A window will appear with the software keyboard.
- Enter the security key using the soft keyboard. To save the settings, press the BLUE button. The value of the security key must satisfy the following conditions: 8-63 characters of the ASCII code or 64 hexadecimal numbers for TKIP/AES or 5 or 13 characters of the ASCII code or 10 or 26 hexadecimal numbers for WEP. You can only set one key identifier for WEP encryption.
- Select the Done option; and then click OK.
- Manual setting (manual adjustment of all parameters)
- In the Preferences menu; go to Setting up a network; → Wireless tuning; → Manual tuning.
- Use the arrow buttons to select Network Name; and click OK. A window will appear with the software keyboard.
- Enter the network name using the soft keyboard. To save the settings, press the BLUE button.
- Select the Authentication option ;, and then go to Open system ;, Shared key ;, WPA-PSK; or WPA2-PSK ;.
- Use the arrows to select the Encryption option; and then select the Low;;, WEP ;, TKIP; or AES ;. Some types of encryption are available only for certain types of authentication. With the value of Open system; Only WEP encryption types are available; ; and, with the value of the Shared key; - only the type of WEP encryption ;, with the value of WPA-PSK; or WPA2-PSK; - only types of TKIP encryption; and AES ;. If an incompatible Identification / Encryption pair is detected, a warning message will be displayed and the connection will not be established until the incompatibility is eliminated.
- Select the Security key; and click OK ;.
- Enter the security key using the soft keyboard. To save the settings, press the BLUE button. If for Encryption; ; this item is grayed out.
- Highlight Done ;, then click OK ;.
If you select Preferences from the menu; → Network installation; → Wireless tuning; Item Support 11n; in the On; position, the Dual channel function will be available; (40 MHz). NOTE: In addition, some other additional functions 11n will be activated. To cancel the setting when performing any setting, press BACK; and then when the message appears, click OK ;.
Setting up digital channels on Toshiba TVs
Depending on the model, the interface and menu items may differ, but the general meaning and order of actions remains relevant.
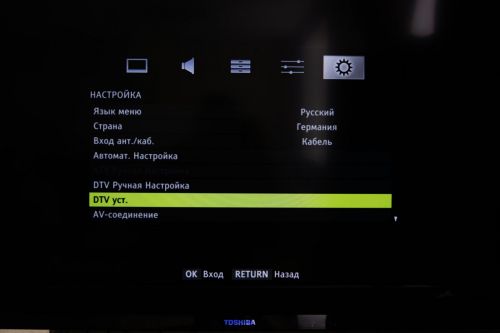
1. Enter the main menu by pressing the button on the remote control. In the "Settings" section, set the following values:
Country - Germany (or other country of Western Europe)
Entrance of the architect. / Cab. - Cable
After that, go to "Automatic. Settings »
Attention! Some models may request a PIN at one of the configuration stages. If you did not install your own, try entering one of the standard ones: 0000, 1111, 1234
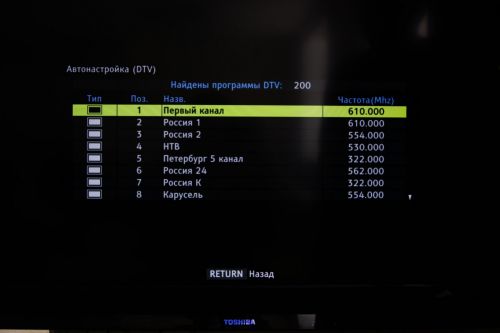
2. Enter the "DTV" setup mode and set the search parameters:
Scan type Fast
Frequency (initial frequency) 306000
Final frequency 354000
Modulation 128 QAM
Character speed 7000
Auto Network ID
Depending on the model of the TV and the selected country, some parameters need not be entered
3. If everything is done correctly, then the TV should find about 58 TV channels
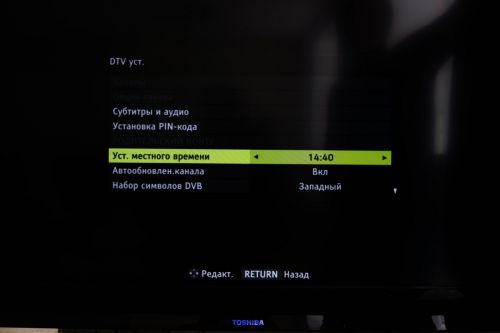
4. After searching for channels, you need to adjust the internal clock of the TV and the audio language, for this go back to the main menu and in the "Setup" section select the "DTV set" item
5. Set the time in the item "Set. local time "
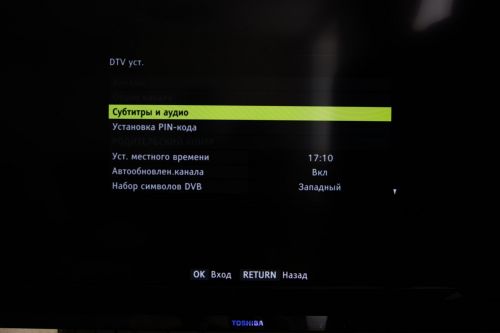
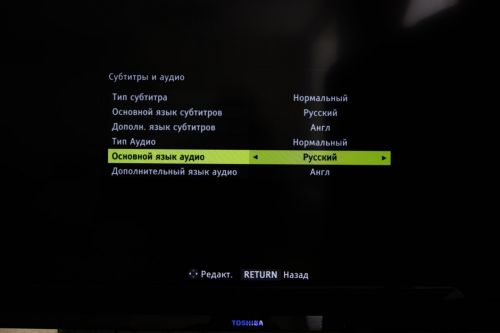
6. To adjust the audio, select "Subtitle and Audio"
7. Set the following parameters: Main audio language - English
When you connect the laptop to a Toshiba TV on the HDMI cable the picture on the TV is slightly stretched and the whole desktop does not fit on the TV screen! Changing the screen format 4: 3 to 16: 9 does not give anything and the resolution of 1366x768 is set on the TV and on the laptop, any other resolution results in very strong distortions. What advice do you give?
Hello friends, in today's short article we will connect the laptop to the Toshiba TV, it's very simple and the problem voiced by our reader is solved.
Nowadays, each laptop has HDMI interface connectors, which is designed to transfer digital video and multi-channel audio without loss of quality. We can transfer this data to a modern TV that supports the HDMI standard! We will use an HDMI cable for the connection. The image transferred from the laptop to the TV will be clear and saturated, and the sound is multichannel.
The first thing we connect the laptop
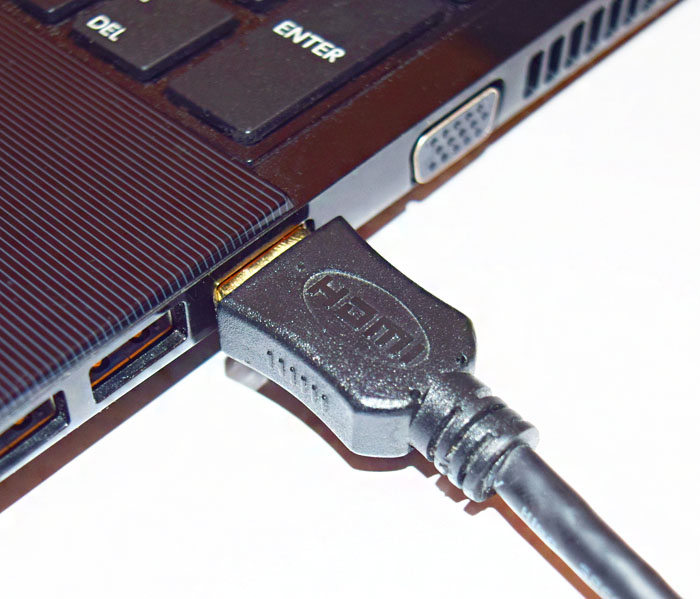
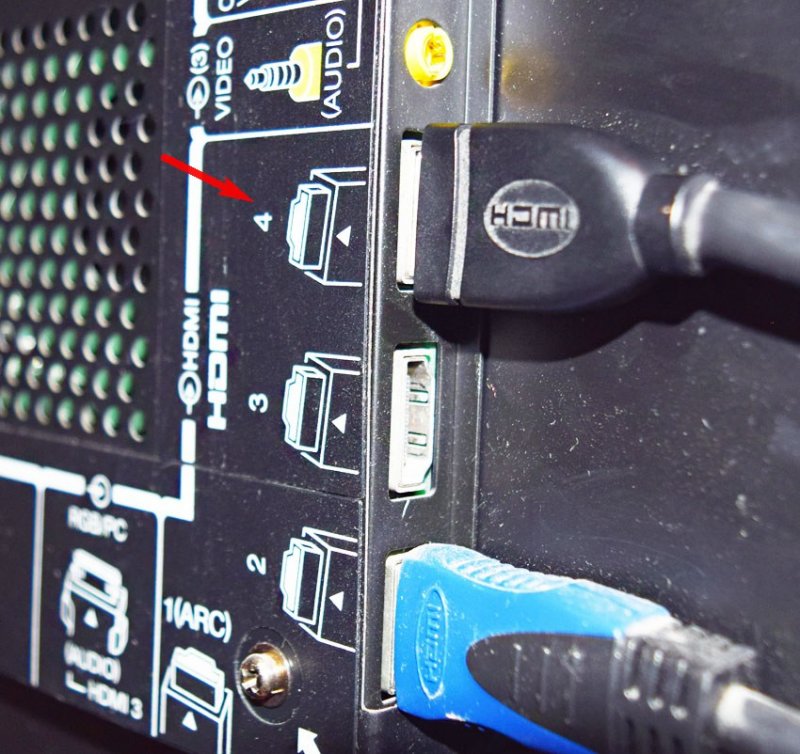
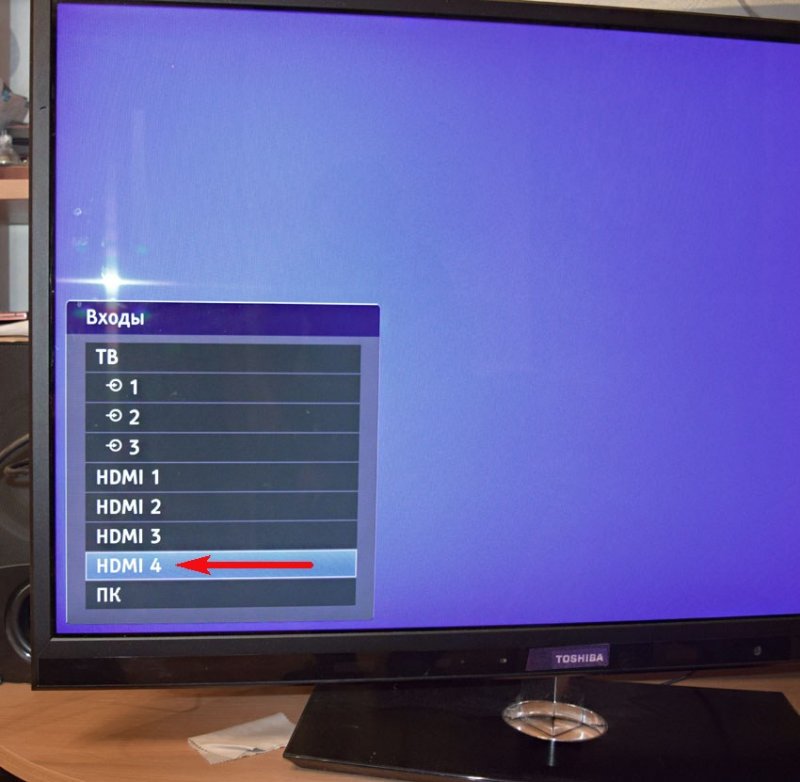
And Toshiba TV with HDMI cable, on the TV we will use HDMI input # 4.
We take the control panel of the TV. To display a list of all video sources, press the remote control button Source (A source).
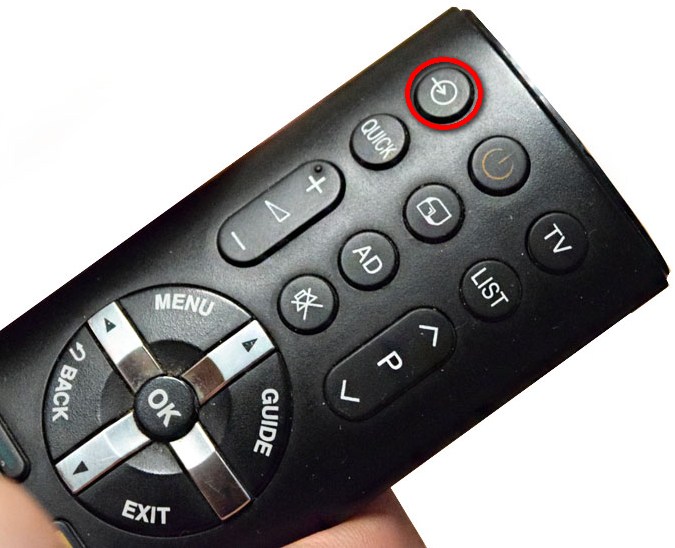
In the list that appears on the TV screen, select HDMI input # 4 and click on the remote control OK.
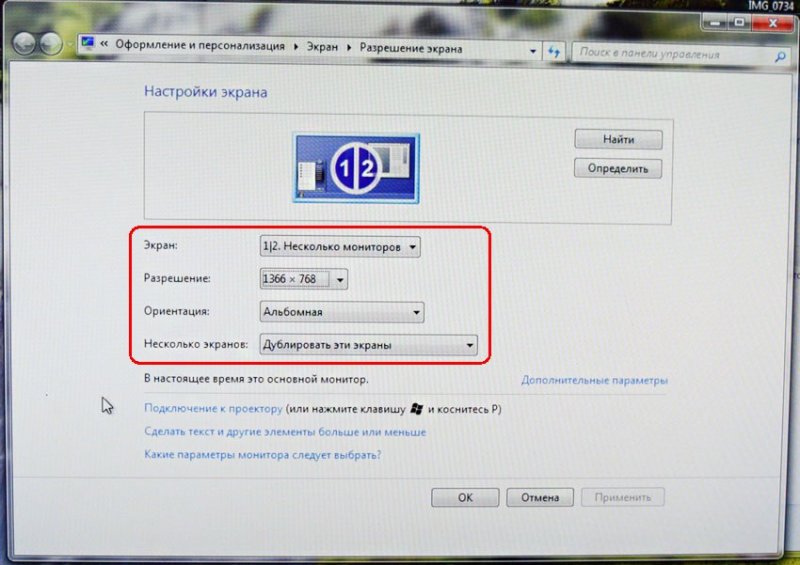
If after that the image transferred from the laptop screen does not appear on the TV, then on the laptop, right-click on the desktop and select "Screen Resolution", then in the "Screen" item the item "Multiple monitors". Resolution in most cases will be set automatically. In the Multiple Screens option, select the "Duplicate desktop on 1 and 2" item. After that, the desktop will appear on the TV.
Note: If you have a 15-inch laptop, then the screen resolution is 1366 × 768. This resolution is supported by most TVs.
But that's not all.
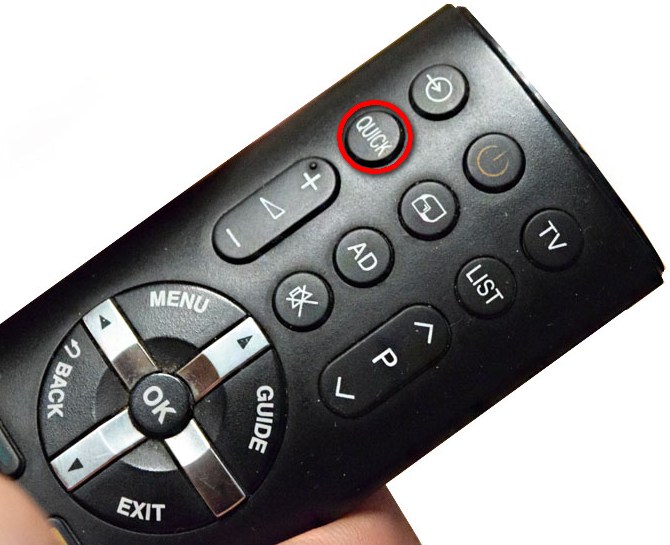
On the remote control of the TV Toshiba click on the button QUICK (quick settings)
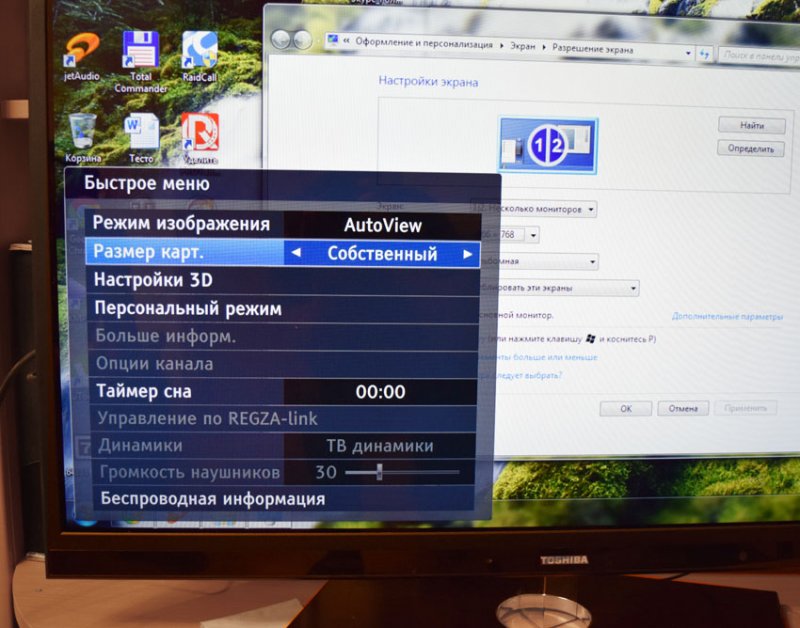
And we set the Resolution of the picture to the "Own" and OK. Now the picture on the TV should be correct.
If there is no sound on the TV, then click on the "Speakers" icon with the right mouse and select "Playback Devices"

Window "Sound". Click the right mouse button on the Speakers and and choose to disable them.

Then right click on the name of the Toshiba TV and select Enable, that's all, now you should see the sound from the laptop on the Toshiba TV.


