How to lay laminate flooring on hardwood floors. Is it possible to lay laminate on a wooden floor and how to do it. Wood floor preparation
One of the most popular interior flooring materials is laminate. It is valued for its beautiful appearance and fairly simple installation process. Experts recommend laying such flooring on a flat, concrete base, however, there are times when the finish must be done on top of the old plank flooring. How to install laminate flooring on wood floor? What are the features of working with such a basis? All this must be known before work begins. Therefore, in our article we will pay special attention to this topic and consider in detail the process of laying this topcoat.
Diagnostics of the old foundation
On the question of whether the laminate is laid on a wooden floor, it is safe to answer positively. However, it is worth mentioning right away that a base made of natural material requires much more attention than a concrete screed. If you need to carry out such work, carefully examine the finished surface for defects and irregularities.
Diagnostics of the old coating includes the following works:
- elimination of large gaps between the boards;
- checking the reliability of fixing all elements of the floor;
- detection of irregularities and sharp changes in floor level;
- dismantling of failed elements and their replacement.
Before laying the laminate on the old wooden floor, you need to prepare the base. Delaminated boards and plywood must be dismantled. Loose elements fasten to the lags using self-tapping screws. Drown protruding nails in wood. Eliminate large irregularities in the base. If the surface level differences do not exceed 1-3 mm per 1.0-1.5 meters, then it is not necessary to level the floors.
If the room where the laminate will be laid is dominated by high humidity, then all elements of the wooden floor should be inspected for the presence of fungus and mold. Affected areas of wood must be cleaned and treated with antiseptic compounds. It will not be superfluous to complete the processing of all wooden structures of the base.
Elimination of small irregularities and defects
If during the examination of the floor, small differences in its level were revealed, then in order to lay the laminate (with your own hands) on a wooden floor, you can use two basic leveling methods. Namely:
- Tsiklevka. This method is optimal in cases where the irregularities are not particularly significant, and to level the surface it is enough to remove a small layer of wood (over the entire base or in a separate section of it). For such work, a scraping machine is required.
- Leveling the top layer with a planer. A planer is able to remove a much larger layer of wood in comparison with a scraper. For this reason, after each pass, the level of the floor must be checked. Using this method, you can smooth out small areas that protrude strongly above the surface.
If the base is strongly curved and partial grinding is not enough, then before laying the laminate on the wooden floor on your own, you will have to carry out more global work to level the surface.
Raising the floor
If there is a strong slope, grinding the floor will be useless. Most often, in such cases, the reason lies not in the floorboard, but in the failure of the logs themselves. Over time, they can rot or deteriorate from the effects of insects and rodents. In this situation, the floorboard must be completely dismantled and the condition of all lags checked. These works are quite long and laborious, but they should not be neglected. A failed base will not last long, so repairs will still have to be carried out, but it will already be complicated by the dismantling of a new coating.

Failed logs and beams must be replaced with new ones. If they are in a satisfactory condition, then they can be raised to the required level. This is done with wooden spacers. Wooden flooring is laid on them. When the floorboard is completely laid, the subfloor needs to be smoothed using the plank scraping method. After that, you can lay the laminate on the wooden floor.
Leveling with plywood and OSB boards
If the repair or installation of the log was made quite recently, but the floor is characterized by large irregularities, it is more advisable to level it with plywood sheets or OSB boards. These works will require additional costs, but will allow you to lay the laminate on a wooden floor with high quality and additionally insulate the base.

In places where the surface drops below the main level, substrates from boards or pieces of slabs are laid under the plywood. The lining material is fixed on the base across the direction of the flooring elements.
Before installing the boards, it is recommended to cover the entire floor surface with a vapor barrier material. Sheets are laid at a distance of 2-3 mm from the walls, with the rows shifted by half the slab. For such work, sheet products with a thickness of at least 10-12 mm should be used.

To level the base using OSB boards, materials with a thickness of not more than 3 mm are purchased. Thick and massive products will play under the coating and lead to its failure.
Installation of plates is based on screwing them to the base using self-tapping screws or nails of a certain length. The distance between the fasteners is calculated by multiplying the thickness of the plate itself by 2.5. A gap of about 5 mm is left between the plates, which is subsequently filled with mounting foam.
Can I lay laminate flooring on wood floors using leveling compounds?
Recently, more and more often the leveling of surfaces is carried out using self-leveling floors. They allow you to easily smooth out an uneven base and give it smoothness and uniformity. At first glance, it may seem that it is impossible to use such compositions on plank surfaces, but this is not so.
Before laying laminate on a wooden floor, the subfloor can be prepared as follows:
- Cover the floor surface with a dense polyethylene film (waterproofing).
- Fix the edges of the canvas against the walls. Lay the rolled materials with an overlap of 15-20 cm, glue the seams with waterproof tape.
- Install a damper tape around the perimeter of the room. It will play the role of a compensator when changing the volume of the screed.
- In places where the floors are below the general level, install metal beacons. They are fixed with cement mortar. The height of the beacon should correspond to the difference in surface height.
- Pour the prepared leveling mixture into the deepest place in the floors and level the mixture using a rule. When the solution dries, the entire surface is poured with a thin layer of screed.
- The solution must be rolled with a needle roller so that no air bubbles remain at the base of the screed.
When the mixture dries, you can lay the laminate on the wooden floor yourself. How to do it right, we will consider further.
Substrate under the laminate: what to use?
The technology of laying laminated panels involves the use of lining materials that act as a shock-absorbing layer. Today, several varieties are available to us, and all of them are actively used for this purpose. Therefore, before laying laminate on a wooden floor, you need to choose which material you will use.
It could be:
- old linoleum;
- foamed polyethylene;
- cork varieties;
- dornit.
If linoleum was used as the old cladding, then after leveling the floor it can be laid in place where it will already act as a lining material. This will reduce repair costs and provide good sound insulation to the new coating.
Geotextile (dornite) is not very often used as a substrate for laminate flooring. This is due to its low heat-insulating and sound-absorbing abilities. However, it is very easy to install and has a low cost, so it is used with limited financial resources.

The cork cloth is the environmentally friendly material which is characterized by the highest indicators of sound insulation and warming. Roll and sheet products are very easy to install, which allows you to quickly lay the laminate on a wooden floor, either by yourself or with someone else's help. Such a substrate reliably protects the panels from damage, but is more expensive than the previous options.
Foamed polyethylene is considered the leader in popularity. It perfectly muffles the noise when walking on the laminate and retains heat inside the coating. The material is sold in rolls, which allows you to quickly roll it out on the surface immediately before laying the laminate with your own hands (on a wooden floor).
The technology of mounting the substrate under the laminate
You should immediately pay attention to the fact that it is highly not recommended to refuse to use the substrate. It compensates for minor irregularities in the base and protects the flooring from damage. If you lay the panels on a hard surface, then be prepared for the fact that the finish will fail prematurely.
Understanding the question of how to independently lay a laminate on a wooden floor, first of all, we will consider the process of installing lining products. It consists of the following works:
- The material is laid or rolled (depending on its type) over the entire surface of the floor.
- Installation of adjacent strips is carried out end-to-end, and not overlapped.
- The joints of the individual elements of the substrate are glued with construction tape.
Now you can start finishing the floor. To carry it out, you will need the following tools:
- electric jigsaw;
- measuring tool;
- wooden pegs;
- rubber mallet;
- construction pencil.
When the material is purchased and all the tools are at hand, it's time to choose the appropriate installation method and start laying the coating.
Laminate installation methods
At this stage, we figured out that laying laminate on a wooden and uneven floor (as in our case) is possible only after careful preparation of the base. But before starting work, you need to determine how the panels are attached to each other. It could be:
- connection with glue;
- lock fixation.
The adhesive method allows you to create a reliable, solid flooring. This method is more often used in the kitchen area and other areas where there is a high probability of moisture on the floor. However, adhesive bonding has several drawbacks. These include:
- complication of the installation process of the laminate;
- inability to disassemble and reassemble the coating;
- the need to wait 10 hours after laying the coating;
- the impossibility of using glue with underfloor heating systems.
The key connection implies the presence of special locks on the laminate that snap into place when the elements are connected at a certain angle.

This fixation is highly durable and prevents the formation of gaps between the panels. If necessary, the cover can be removed and laid again.
How to properly lay laminate on a wooden floor: installation technology
Laminate installation technology depends on the chosen method of fixing the panels, but there is no significant difference in these processes. We will look at how to lay laminate on a wooden floor with a key connection. Mounting with glue is carried out in the same way. The only difference is that the ends of each element must be coated with the selected composition.

So, the technology for finishing the floor with panels is as follows:
- Laying the laminate begins with the installation of the first solid element. It is placed at a distance of 10 mm from the edge of the wall. To prevent this gap from moving during the work, wooden spacers are inserted between the panel and the wall. The distance between the wall and the flooring must be left along the perimeter of the entire room. It is necessary so that in the event of a moisture difference, the coating does not swell and break in the locks.
- The first row is mounted by joining the elements. If at the end you need to insert a small piece of the product, it is cut off with a jigsaw.
- The second row begins to be laid already from half the panel. The elements of the second row are inserted into the locking hole of the panels of the first row and are slightly pressed from the ends of the plank. Thus, the entire coating is laid. Each odd row starts with a whole bar, and the odd row starts with half of it.
- If the first row of the laminate consists of only whole strips, then the second one still starts with half the panel. This is necessary so that the joints of the laminate in adjacent rows do not coincide. So the coating will be distinguished by increased strength and beauty. In order to save money, you can use the leftovers from the last planks of the previous rows.
It often happens that for the installation of the last row of the board, you have to saw it along. This work must be done very carefully so that the cut is as even as possible. If you made small mistakes, do not rush to throw out the panel. Small irregularities can be hidden under the floor plinth. After the floor covering is fully assembled, you can proceed with the installation of skirting boards.
Summing up
In this article, we gave an exhaustive answer to the question of whether it is possible to lay a laminate on a wooden floor and how to properly perform such work. Many experts recommend completely dismantling the old boards and pouring a new concrete base, but this leads to additional costs and loss of time. If this option is categorically not suitable, floor finishing can be done using the above recommendations.

In order for the coating to last as long as possible, special attention should be paid not so much to its laying as to the preparation of the base. If you manage to perform these works correctly, then the long-term operation of laminated panels is guaranteed to you.
Before starting work, it is recommended to remove the laminate from the packages and lay it out in the room where it is planned to be installed. This will allow the panels to "get used" to the microclimate of the room, which will help to avoid deformation of the coating after its laying (due to a sharp change in humidity and air temperature). Otherwise, laying laminate flooring on wood floors has no special features and is similar to installation on top of a concrete base.
In this article, we will talk about the experience of laying laminate on a wooden floor in a panel house. We are talking about budget repairs that everyone can afford.
This is what it looked like before the renovation...
The first problem that every inhabitant of a panel house faced was the creak of wooden floors. That's why it happens: the floorboard is nailed to the joists, which loosened over time, and the floor began to creak.
The next problem is a very uneven floor with large differences between the boards. To lay a laminate, such a floor must be leveled, while the maximum allowable height differences should not exceed 2 mm by 1.5 m.
To eliminate these problems, we decided to level the wooden floor with plywood. But if you just screw plywood over creaking boards, then, of course, it will not get any better. Therefore, first you need to strengthen the floor with screws.
We dismantle the old plinth. If it is plastic, there will be no problems, but the wooden plinth needs to be torn off with a mount or a nail puller. We pull out all the protruding nails, remove the large protrusions with a planer. Before laying plywood, do not forget to wash and vacuum the floor well.
 Getting the wood floor ready for renovation
 Now it is important to determine at what height the wooden floor is raised above the stove; for this, 1-2 holes are drilled in the boards. Knowing the distance between the base and the boards is necessary to determine the size of the floor screws. Usually it is 8-10 cm, but on the first floor there are all 25 cm.
After raising the floor level, the door may not open: the thickness of the laminate with the underlay is almost 1 cm + the thickness of the plywood (minimum 0.6 cm). If the door is old, then it can be filed with a hacksaw without any problems, simply by removing it from the hinges. And for trimming a door with a laminated coating, thick plywood must be placed under the bottom, otherwise chips will appear at the cut site.
Material calculation

Next, you need to calculate how many screws you need. To do this, we look at how many lags are in the room (they can be found by nails or seen through a gap near the wall). Then we count the number of boards in width and multiply the resulting amount by the number of lags.
Each board is screwed with 1 screw to the log, every 40-60 cm. For example, if there are 11 logs and 28 boards in a room, then 308 screws + 10-20% for the stock will be required.
It is better to fasten plywood every 15 cm, if less often - it will swell and dangle when walking. The length and width of the room are measured and the resulting amount is divided by 15 cm, and then the values \u200b\u200bare multiplied. For example, our room is 3x5.6 m in size. Divide 3 meters by 0.15 = 20 pcs, divide 5.6 m by 0.15 = 38 pcs. Now we multiply 20 by 38 and we get 760 pieces, + 10-20% for the stock. For plywood, wood screws 25-30 mm thick 3-3.5 mm are suitable.
Now we consider how much laminate is needed. To do this, you need to find out the dimensions of the room, and do the calculation already in the store, because the laminate panels have different parameters. Our room is 17 sq. m. In one box, a laminate with an area of approximately 2.6 square meters. m. Divide 17 by 2.6 = 6.53. We round up, which means we need 7 boxes, and half the box will be in stock, in case of marriage.
This should be enough if you lay the laminate in the usual way: cutting costs are approximately 5%. If laying diagonally, the margin should be at least 10%.
When buying a laminate, it is important that the delivery batch on all boxes is the same. In boxes with different batches, the shade of the picture may differ. Also, the pack must be intact, otherwise the locks may be damaged.
Now we count the amount of plywood. We chose plywood with dimensions of 1.43x1.52 m, that is, the area of \u200b\u200b1 sheet will be 2.17 square meters. m. We divide the area of the room (17 sq. M.) by the area of \u200b\u200bplywood and get 7.8 sheets. So, you need to buy 8 sheets of plywood. The thickness of the plywood must be at least 12 mm.
Strengthening boards with screws
So, all the materials have been purchased, we proceed to strengthen the floor with screws. The site has an article about what to do with the creaking of the floor in the apartment, it partially talks about this work.
Since the screws were difficult to penetrate into the wood, we first drilled holes about 70% of the length of the screw, and then pulled the boards to the joists with screws.
 We strengthen the floor in rows along the logs
 Of course, if you have a powerful screwdriver, you can do this much faster without additional drilling. In our case, the cheapest Chinese screwdriver, which quickly sat down, so all the work dragged on for several days.
The main thing is to tightly fasten the boards to the joists so that they do not hang out when walking.
Since the doors will soon be changed, we file the slopes to install the plinth.

During the work, it turned out that it was blowing too hard from under the floor from the side of the street, so I had to seal the gap with foam. In this case, it is necessary to moisten the surface before treatment with water, and also spray the foam after application, since moisture is necessary for the polymerization process of the mounting foam.
 There was a strong breeze from the street from this crack
  It got so much better
 Plywood leveling
 To level the floor with plywood, lay the sheet on the floor and fasten it every 15 cm with screws. Do not forget to leave a small gap between the sheets and near the wall. The even arrangement of plywood sheets is controlled using a level. Sheets that require trimming are sawn with a hacksaw or jigsaw.
Substrate laying
 The cat is scared...
 We chose the cheapest substrate, made of polypropylene. Before laying, vacuum the floor again.
We lay the substrate with a margin on the walls, so that later we can cut off the excess, and glue it together with adhesive tape. The substrate should lie in one layer, butt to butt.
Laminate laying
Having finished preparing the floor, we proceed to laying the laminate. Before that, you need to store the laminate for several days in the room (to adapt the material to the temperature and humidity of the apartment).
Laying starts from the corner of the room, preferably from the most prominent place. However, there is a small nuance here: if the door opens into the room and no one plans to remove it, then they begin to lay the laminate from it, otherwise it will not be possible to lay the last row later.
 We start laying from the door
 It is best to place the wide joints of the laminate along the light from the window, so the gap will be less visible (they will increase over time).
Modern laminate is mounted without glue, using the locking method. This type of flooring installation is called floating, because it is not rigidly fixed to the floor, but rests freely on the substrate. During the change of season, the coating changes its dimensions a little, so it is impossible to screw the laminate hard to the floor with screws. Along the perimeter of the panel there are locks that are connected if one of the panels is inserted at an angle and then lowered.
To see how it works, watch the video tutorial:
The panel is laid in the corner and the next one is joined from the short side. Thus we collect the first row. The last panel, most likely, will have to be filed. This can be done with a jigsaw or saw, but make sure that the teeth are small, otherwise there will be chips on the laminated surface.
 First row done
 The main rule when laying laminate flooring is to leave a gap of about 1 cm near walls, pipes, doors and other obstacles. At the same time, you should not make a gap of more than 2 cm, because the thickness of the plinth will not be able to cover it later.
 The wedge is needed to withstand the same gap near the wall
 For ease of installation, stores sell a special kit for laying laminate. It includes wedges of the same thickness, a mounting foot for installing the last row and a wedge of panels.
For additional sealing of the seams, you can buy a special sealant paste and coat the locks with it before docking. However, in wet rooms it is better to use tiles or porcelain stoneware.
The second row is laid in the same way as the first, and then inserted into the previous one. To simplify the task, we recommend laying the panels as close to the lock as possible, so that later you can simply lift the entire row and snap into place. This is done by simply pressing the row at an angle.
 To connect, insert the panels at an angle
  Then we lower the panel so that the second row lies next to the first
  We join adjacent rows with our hands
  As a result, the joint should not be visible.
 Some types of locks allow you to join the laminate not in a whole row to the previous one, but one at a time. For example, Quick Step laminate has universal locks: they can be inserted horizontally or at an angle. At the same time, there are Click-locks that only hammer horizontally.
It is not necessary to immediately leave a gap between the first row and the wall. It will be more convenient to collect 3-4 rows, and then move them to the wall, and you can put something heavy on top. This is much easier, especially if the wall is not very flat.
Another important feature is that the panels are stacked in a checkerboard pattern. If the first row started with a whole laminate panel, then the second one should be started with a half, and the third again with a full panel. So the connections of the locks will be denser, and the cost of trimming will be minimal.
Half of the room is readyThus, in a checkerboard pattern, we lay the remaining rows of laminate. When we reach the heating pipe, cut out a round hole with a jigsaw or drill. Then the trim is simply laid and pressed with a plinth or glued onto liquid nails.
When we reach the last row, we need to file each panel in width, taking into account the gap. Installation takes place in the same way, we snap it with a strong pressure on the panel at an angle.
 The floor is almost ready
 Skirting board installation
Plastic plinth with cable channel consists of two parts. The first is a wall mount, and the second is a decorative nozzle that snaps into place at the top. There is another type of fastening - first, metal brackets are attached, and then a plinth is put on them.
We drill holes for dowels approximately every 30 cm and fasten one part of the baseboard. We fix the main part, hide the wires, then put on a decorative nozzle. For a beautiful docking, we use special accessories for the plinth: adapters, external and internal corners, plugs.
We put on a special stroke around the pipe to hide the gap (it costs about 50 rubles). In our case, the pipe was very close to the wall, so I had to cut the plinth and saw off the stroke, and then glue it on liquid nails.
Buy a skirting board and all accessories at once together with a laminate. Otherwise, if there is a shortage of material, you will have to travel to many stores before you can find the right color.
And the final touch is the fastening of the threshold at the door. It is needed to hide the height difference between the rooms. The rules for laying laminate flooring require that different rooms be separated by a gap so that the coatings are independent. However, in practice, if the same coverage is chosen for adjacent rooms, you can not use the threshold, but do everything without seams: it will be prettier, and cleaning will be easier. If some defect appears later, it is more convenient to actually saw off the coatings in the doorway.
floor repair cost
- Birch plywood 6 mm thick, 8 sheets - 2300 rubles.
- Laminate Kronostar Pear White 31 class - 7 boxes. 1 sq. m. cost in Leroy Merlin 235 rubles. Total 4112 rubles.
- Substrate for polypropylene laminate - 1 roll 2 mm thick, 25 m long - 320 rubles.
- Screws and dowels - about 600 rubles.
- Plastic plinth with cable channel 8 pieces, 2.5 m each - 150 rubles.
- Stroke around the pipe, connectors and corners for the plinth - 420 rubles.
- Porozhek - 160 rubles.
As a result, the amount is: 9112 rubles.
 The cat obviously did not like the new slippery floor
 - It is better to take plywood thicker, 6 mm is still not enough, so you should not save on this. Next time we would take at least 12 mm plywood. If the floor is too uneven, then you need to lay plywood in 2 layers, with offset joints.
- We advise you to choose not too thick or long screws, they will be difficult to screw.
- You can not buy a soft substrate thicker than 3 mm, it will strongly spring when walking, and the floor under you will be pressed through. For more information, we recommend reading our article on.
- If the laminate is laid on a concrete floor, then before laying the substrate, a layer of polyethylene must be laid for waterproofing.
- For productive work, you need a good screwdriver with a powerful battery. So you save a lot of time.
Spending a small amount to repair the old wooden floor, we got rid of the squeak, made it smooth and pleasant to walk on. It took three days to prepare the floor for the laminate, and one day was spent on laying alone.
This material can be laid on any rough floors: concrete, tile, linoleum or boards. The most important thing is that they are strong, rigid and perfectly even. Today we will look at the basic nuances of how to lay a laminate on a wooden floor, and also describe this process step by step.
Surface preparation
Wood floors should be carefully inspected before laying laminate flooring to identify defects. The floorboard needs to be repaired if:Deflection or deformation;
Instability (displacement of boards when pressed);
The presence of large cracks, knots and depressions;
Damage caused by fungus.
Old wooden floors are best dismantled to support bars. It is possible that over the years of operation they have overgrown with mold and fungi. In this case, the damaged logs are replaced with new ones, and all the remaining ones are treated twice with an antiseptic.
Rotten logs need to be replaced
Remove and replace and all damaged floorboards. The gaps between the boards are filled with a special putty for a wooden floor. Small differences in height, including those formed by layers of paint, can be eliminated with an electric plane or scraper. In small areas, the influxes are removed with sandpaper.

Scraping painted floors
If the floors were laid recently, they can not be removed. In this case, only fasteners are checked, loosely fixed ones are replaced.
Important! Before scraping, the caps from nails and self-tapping screws must be sunk a few millimeters into the tree.
Eliminate height differences
As a rule, uneven floors are the main problem when laying laminate. Perhaps there is no apartment in which the floorboards are laid perfectly.The laminate lamellas (boards) linked together are, in fact, a single canvas (such floors are called floating). This explains the strictest requirements for their installation. Indeed, at the slightest deflection, the entire structure can be deformed.

Irregularly laid laminate
Permissible differences in the height of the surface on which the laminate will be laid is no more than 2 mm for every 2 m. Moreover, if its locks are damaged during the warranty period, the manufacturer may refuse to replace the lamellas or return funds due to a violation of the laying technology.

Permissible height differences
That is why, after repairing wooden floors and eliminating their damage, the surface must be perfectly leveled. In case of strong height differences, the linings are installed under the logs of the supporting wedges. The final leveling of the floors is carried out using linings from scraps of plywood sheets, fiberboard or wooden beams.

plywood flooring
Important! Do not lay plywood or fiberboard close to the walls. After all, when changing temperature or humidity conditions, it is able to change its size. The size of the compensation (technological) gap - the distance from the wall to the outer sheets - 0.5 cm.
Calculation of the amount of laminate
It is not difficult to calculate the floor area and determine how many square meters will be needed for laying. The only thing to consider is trimming waste:With diagonal laying, they will be 10-15%;
With the usual method of laying waste, there will be less - up to 5%.
Advice. Since the color of the lamellas can vary even in one batch, in order to obtain a uniform pattern, it is better to take the laminate alternately from different packs when laying.
Why is an underlay needed?
Another important requirement when laying this flooring is the obligatory presence of a substrate. It performs the following functions:Finally levels the floors;
Evenly redistributes the load between the lamellas;
Filling all the free space between the surface and the laminate, protects it from deformation;
Absorbs noise from footsteps;
Performs the function of a heat insulator.
The best option is a substrate polystyrene foam. It is much cheaper than cork, while keeping its shape perfectly. For flooring on wooden floors, a 2 mm underlay will suffice. It is better not to use cheap polyethylene foam - over time, it will quickly sag and lose its shape, and the floors will begin to deform and creak.

Polystyrene underlay for laminate flooring
Underlayment for laminate flooring
After leveling the floor and cleaning it of debris, a springy damper tape is laid along the walls to dampen sounds. So that the seams of the substrate do not fall on the joints of the boards, sheets or a rolled substrate are rolled out on the floor across the direction of the laminate lamellas.It is laid only with the smooth side up and is butted together, without overlap. To avoid shifting of the substrate, all sheets are fastened together with construction tape. If the damper tape is not used, you can bring the edges of the substrate a little on the wall for a couple of centimeters. In the future, the excess is cut off. In order not to crush the porous material when walking, it is not recommended to lay the entire substrate at once - it is better to spread it as needed.
Laying laminate step by step
1. To protect the laminate from swelling during temperature changes, small spacers from plywood or small bars 0.5-1 cm thick.

It is not recommended to lay laminate flooring close to the walls.
2. So that the joints between the slats are not conspicuous, they must be located in such a way that the light passes along them (with their narrow side towards the window).
3. The first row is located with a spike to the wall.
4. Further laying is carried out only with offset seams(in a checkerboard pattern), that is, the center of the board of the next row should fall at the junction of the previous lamellas. In order to obtain a similar offset, the first board of the second row is cut in half or (long boards) 2/3.
5. Lamels can have two types of fasteners. Each package has a pictogram indicating the type of attachment and how to connect it.
6. When fastening the click type (the most common), the board to be joined is slightly tilted at an angle of 30 and pressed against the second lamella with a slight effort until a characteristic click. To strengthen the connection, the connected boards are knocked together with a rubber mallet. Boards with a lock-type fastening are simply hammered into the neighboring boards with a slight tapping of the hammer until they click.

How to install laminate

Laminate padding
Advice. In order not to damage the fragile lamellas, when trimming the boards to each other, you can use a wooden block through which the boards are knocked out with a hammer.
7. The lamellas adjacent to the pipes are cut in half so that the cut falls on the center of the pipe. Further, holes are cut in the boards a couple of millimeters larger than the diameter of the pipe. To seal the connection and dampen sounds (metal and bimetallic pipes are very good conductors of sound), rubber gaskets are placed.

Battery laminate installation
8. To obtain a neat joint, the door jambs are slightly filed down along the thickness of the lamella.

The jamb is sawn down so that the lamella enters
9. The transition to another room can be made with an aluminum threshold, which is inserted between the laminate boards, or with a special wooden threshold with grooves.
Video: Laying laminate on a wooden floor
Among modern materials used for installation on the floor, laminate occupies a special position - this universal material is one of the few that can be used both on a monolithic base and on a base of wooden boards. True, it should be noted that it is possible to lay a laminate on the wooden boards of the old floor only if a number of technological operations are observed, designed to make the laying work as easy as possible and extend the life of the floor. At the same time, this technology allows not only to significantly save on materials, but also significantly reduce the complexity of the work.
Wooden floor, what are the features and benefits
Unlike concrete pouring or sand and gravel floor screed, a wooden floor has an undeniable advantage - it, like all natural materials, fits perfectly into almost any interior, and most importantly, provides greater safety and comfort. Indeed, the wooden plank floor is warmer, does not give off cold and allows you to be on it without shoes. True, such a floor also has its own characteristics - the floor of wooden boards should be as even as possible for laying any surface coating and not have foci of fungal infections.
On the other hand, the boards lying on the logs, even if they are firmly reinforced and treated with an antiseptic, still remain separate fragments of one whole, which gives the right to assume that the entire floor structure is still subject to changes - deflections, structural deformation of the fibers, seasonal changes in humidity. wood. Such a "floating" floor is the main feature of the base of the coating under the laminate.
For almost all types of wooden floors, regardless of the material of the boards, the surface of the coating becomes a problem over time. Under normal operating conditions, when all conditions are taken into account when laying the floor, from filling the space under the lags to taking into account the direction of the location of the fibers of the boards, problem areas still arise over time, where the boards simply begin to warp. Such changed surfaces of the coating will create the main problem areas when laying the laminate, changing the surface of 1-2 boards in a small area will ultimately lead to a breakdown in the interlocking of the panels and the need to replace the entire coating.
Thus, laying a laminate on a wooden floor requires a certain amount of preparatory work, designed to ensure maximum compliance with the conditions for laying the floor.
What you need to do when preparing a wooden floor for laying laminate

The technical conditions for laying laminate on any surface require that the surface be as flat as possible and free from any flaws and errors. The height difference of the base for laying the laminate is maximum 2 mm per 1 running meter of the floor. But regarding the flaws, here it is necessary to prepare the base in such a way that there are absolutely no protrusions and tubercles on it, which can lead to damage to the material planks.
Thus, in order to prepare a wooden floor for laying a laminate, you must:
- Conduct a survey of the entire surface of the floor for the presence of rot and affected boards;
- Ensure the leveling of the floor boards or their partial replacement;
- Carry out leveling of the surface in order to ensure its maximum leveling, both along the wood fibers and across;
- Ensure the maximum depth of fasteners - screws, nails, bolts, so that the caps do not come to the surface.
For a new floor, there is no great need to inspect the space under the boards in order to ensure the safety of the boards, it is enough to treat the wood additionally with a deep penetration antiseptic composition and ensure effective ventilation of the space between the joists.
For a coating that has been in operation for a long time, it is necessary to check the condition of the boards, the lag and make sure that there are no rot, places of fungal infections and physical defects of the boards.
Using a rule 2 meters long, the condition of the base surface is checked. At the same time, areas with large deflections and deformations of the boards are identified, these areas are marked on the surface with a marker for further processing. Processing can be carried out both manually using a wooden or metal planer, and using an electric scraper or electric planer. The surface is leveled both along and across the fibers of the boards.
The final stage of work with floor boards is usually carried out in the form of deepening fasteners into the thickness of the boards, nails, screws and self-tapping screws are sunk into the thickness of the boards to a depth of 3-4 mm, this is enough so that the fasteners do not interfere with the laying of the next layers of the coating.
Base layer decking

To ensure maximum strength of the wooden floor surface, an additional layer of slabs can be installed. This technique is more effective than laying laminate on wooden boards:
- First, building boards made from chipboard, fiberboard, plywood or wood-oriented board provide a large monolithic surface.
- Secondly, the slab base will allow you to lay the laminate in any direction, and not just across the direction of laying the boards.
- Thirdly, a large area of the plates allows you to avoid large distortions of the surface and provide the necessary indicators for laying the laminate.
Laying a layer of slabs in no case exempts from the preparatory work associated with leveling and preparing the wooden floor. All operations with a plank floor must be completed in full.
Laying of slabs begins with the removal of skirting boards around the perimeter of the room, slabs, as well as wood and laminate, undergo deformation when heated, which means that during installation it is necessary to provide a thermal gap both between the slabs and between the coating and the walls. Usually, for this, when laying, a gap is set between the wall and the coating of 0.7-1.0 cm, and between the plates 0.2-0.3 mm.
The slabs are laid perpendicular to the direction of the boards, thus providing a large surface leveling area. When laying, the height of the slabs is preliminarily checked - at the joints, the height of adjacent slabs should be the same, and during installation there should not be even a 1 mm difference in height.
The slabs are stacked in a checkerboard pattern with a shift of ½ of the slab length. Plates of small thickness up to 8 mm, in addition to fixing with screws or nails, can be laid on an adhesive or mastic. But for a thickness of 10-15 mm, such a fixation will be an extra mass of material and so sufficient to lie tightly on the boards.
As with a wooden floor, the surface of the slabs after laying is checked by the rule and level, for the presence of differences. And additionally, a robot is carried out to deepen the nail heads into the surface of the plate.
Materials and technology for laying the preparatory layer

A feature of the laminate is the composite nature of the coating, when a single coating is made up of individual plates, in which the connection of individual elements occurs due to the interlock connection. Such a coating is distinguished by the ability to "play" under the weight of objects, while the flexibility of the plates allows you to maintain the integrity of the coating even with significant deformations.
When installing a laminate, it is also necessary to take into account the fact that when heated, the laminate itself expands, which means that it is necessary to take into account the so-called thermal gap between the walls and the coating. Rigid fixation of the laminate on the base would lead to a quick breakdown of the coating and, as a result, the need to replace it, but the use of a shock-absorbing substrate makes it possible for the laminate to sag under the weight of objects without compromising integrity.
As a substrate for a laminate on a wooden base, sheet and roll materials are usually used. Sheet materials include sheets of extruded polystyrene foam or natural cork. Roll materials include a cork or polyethylene foam substrate. The thickness of such material is usually 3 mm, but in some cases, for example, for laying on the ground floor of a building, a thicker material is also used - 5 mm.
For concrete bases, there is not much difference what material is used, and roll and sheet material equally well lie down on concrete, but for wooden bases, the use of rolled polyethylene is not recommended. Covering the entire surface of the floor, such material actually blocks access to the space under the floor of air and thus clogs the moisture that is there. Sheet materials and rolled cork allow what is called "breathing" of the floor, and thus provide the necessary ventilation under the floor.
Laying of sheet materials is carried out by the “diagonal” laying method, when the sheets are built up with the strips shifted along the length relative to each other by ½ sheet. Another point when laying the substrate in the form of sheets is the need to arrange the strips with an offset of 90 degrees relative to the direction of laying the laminate itself.
The wrong side of the first row of the substrate is fixed with double-sided tape, but the rest of the strips are simply fastened with ordinary clerical wide tape.
Technology of laying laminate on a wooden floor

For laminate, as well as for laying the substrate, it is recommended to use the diagonal laying method, when the plates are shifted by ½ of the plate length relative to the previous row. Laminate flooring is carried out in two main ways:
- Docking strips one by one with a gradual increase in the coverage area;
- And by connecting the boards in one row and later joining the entire row to the already drawn up area.
For small spaces, both docking methods can be used. But for rooms with a wall length of more than 7-8 meters, docking in rows will be very difficult.
The first row of laminate is laid opposite the front door, taking into account the thermal gap of 7-10 mm from the wall, and the necessary cutouts for heating communications. The edge of the boards facing the wall is cut to the width of the interlock, thus providing maximum strength for the installation of skirting boards.
The panels are laid in such a way that the connecting groove of the panels faces the installer. The first board is cut in half, using it as an offset step, it is usually recommended to do an offset for panels of more than 30 cm of normal thickness.
Laying the first row is regulated by wedges inserted between the laminate and the wall. The second row is already selected both according to the type of lock connection and according to the texture of the image. The offset is provided by using a segment of the first bar. All panels are connected in a row, and then inserted into the lock and connected into a single whole.
As you move towards the front door, all rows are aligned with the walls in compliance with the required thermal gap. The last row is set taking into account the threshold of the door, if there is none, then a metal lining is used to close the panels.
As you can see, the rules for laying laminate on a wooden floor practically do not differ from the general rules and technology for laying laminate flooring and almost anyone who wants to transform their home can handle it.
Most often, laminated panels are laid on a concrete screed base, and not on wooden floors. Therefore, finding information on the technology of such styling is quite difficult. In this material, we will tell you how to put a laminate on a wooden floor so that it retains its attractiveness and functionality for a long time.
Distinctive qualities of a wooden floor under a laminate
For everyone who still doubts whether it is possible to lay a laminate on a wooden floor, let's say right away - it is possible. A wooden base is just as suitable for laying laminate flooring as, say, concrete. True, it should be borne in mind that the plank floor has some distinctive characteristics that may affect the further operation of the laminate.
Therefore, before laying a laminate with your own hands on a wooden floor, it is worth understanding all the intricacies and features of such a material in order to avoid possible complications in the future.
In essence, there are only a few basic requirements for the surface under the laminate - cleanliness, that is, the absence of dust and dirt, dryness, evenness and reliability.

Note that, contrary to the claims of the manufacturers, the substrate, although it compensates for minor flaws in the base, still does not have sufficient rigidity to eliminate all defects. This should be taken care of separately.
The main differences between a plank base for a laminate and a concrete base are as follows:
- Stability. This means that the fastenings of the floor boards weaken over time, individual sheets may shift somewhat relative to each other, which leads to an increase in the load on the locking mechanisms of the laminate. By the way, it is the locks that are the weak points of the laminate.
- Mechanical strength. A plank floor is significantly inferior to a concrete floor in this indicator, since the tree becomes more fragile and weak over time. Therefore, before laying a laminate on a wooden floor, it is worth making sure that the underfloor structures (support bars or logs), as well as the boardwalk, are durable and do not need additional repairs. Otherwise, you need to eliminate all defects before laying the laminate on the wooden floor.
Plank base preparation
Wooden base quality check
The preparatory stage before laying the laminate on a wooden floor involves checking the floor and its supporting structures for strength and reliability.
As a rule, it is not necessary to completely remove the boardwalk to make sure the quality of the lag. Such emergency measures are needed only if it is necessary to raise the level of the flooring, or if one or more logs are rotten and can no longer perform their functions.
First, you should check the horizontalness of the floor, conduct a visual inspection of the boards, and also tap the flooring in order to detect cracks or chips. All the data obtained allows us to build a complete picture.

It is advisable to lay a laminate on a wooden floor with your own hands if it:
- consists of whole, strong boards in which no cracks or rot were found; has no cracks and looks good;
- able to withstand operation for a long time;
- does not bend while walking or under the influence of other loads (with the exception, perhaps, of heavy cabinet furniture);
- does not make sounds;
- has an ideal horizontal surface without flaws (knots, chips), and the permissible deviation from the horizon should not exceed 2 mm per 2 m.
If the wooden base meets all the conditions, you can proceed with the installation of the laminate. Conversely, if the requirements are not met, the foundation should be repaired first.
Performing wood floor repairs
Often, when working with wooden floors, builders are faced with the problem of the curvature of the flooring, that is, in different parts of the room there are differences in the level of the floor relative to the horizon. The solution to this problem will be discussed separately.
However, plank floors may have other defects that require attention before laying laminate on a wooden floor.

You can solve various problems with the floor in this way:
- All boards that are rotten or damaged by insects or mechanical damage need to be replaced. If the board is deformed on only one side, it is allowed to turn it over and lay it on the logs inside out.
- In the case when one or more floorboards turned out to be loose, they must be fixed with self-tapping screws. It is worth considering that for these purposes it is better to use nails if scraping is subsequently performed. In this case, the nail heads must be drowned in the canvas of the tree.
- Loose floorboards, together with joists, must be fixed directly into the concrete base. Anchor bolts fixed in through holes in logs and concrete are optimal for this.
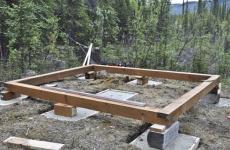
- If the frame of the wooden floor sank, then in problem areas the flooring must be disassembled and the logs raised in level with the help of wedges. But if the logs are not suitable for further use, the entire plank floor is dismantled and the frame is reassembled from new logs.
- Minor cosmetic defects in the form of potholes, cracks or cracks can be puttied.
Leveling the boardwalk by sanding
If anyone is looking for a way to put a laminate on an uneven wooden floor, let's say right away that it is better not to do this, since such a base will shorten the life of the coating, and create unnecessary trouble in the form of creaking when walking (more: ""). Before laying the laminate, all irregularities must be eliminated. If they are insignificant, that is, they do not exceed 4-6 mm per 1 m 2, then you can get rid of them by grinding with an electric planer or sanding.
Note that if only small localized defects are observed, a manual scraper or emery may be useful for leveling.

Before starting surface treatment with a grinder, you should take care of deepening all the nails into the thickness of the tree so as not to damage the tool. It is better to carry out scraping in segments, after completing the processing of each of which, it is important to check the horizontalness of the surface and the quality of work.
Plywood or chipboard for leveling the floor

This process is carried out in the following sequence:
- Prepare sheets of plywood with a thickness of at least 15 mm, in a word, the thicker, the better, as far as the budget allows.
- Plywood is treated with fungicides or drying oil to prevent the appearance of fungus.
- The subfloor frame is leveled using support wedges or adjusting screws that set the level on the logs.
- Using a circular saw, plywood is cut to the desired size (read also: "").
- Starting laying plywood sheets, control level differences. If deviations are observed, underlay rails are placed under the plywood to eliminate them. In the process of laying plywood, you need to make sure that the seams go apart and do not combine at one point.
- At the last stage, the plywood is fixed to the base.

Laminate laying
The process of how to properly lay a laminate on a wooden floor includes the initial placement of a polyethylene waterproofing layer on the base, and a special substrate on top of it.
The substrate under the laminate is designed to perform several functions: to compensate for minor differences in floor level; serve as thermal insulation; contribute to the absorption of extraneous sounds.

At the same time, an extensive selection of substrates from various materials is available for sale:
- polyethylene foam;
- cork;
- from bituminous cloth with cork grains;
- polyurethane foam, with reinforced density.
Depending on the material, in the form of release, there are sheet and roll substrate materials. The substrate under the laminate is always laid only end-to-end, and I glue the seams between adjacent canvases with adhesive tape to prevent displacement. Then you can proceed directly to the installation of the laminate.
Laminate flooring
Let us consider in detail the technology of laying laminated panels, which includes several successive stages.
Starting from the corner of the room, located at the window, lay out the first row of panels along the wall, joining them together with end parts. At the same time, it is worth remembering that the laying of panels on a plank base should always be done across the flooring boards. To provide the necessary clearance, limiting plastic or wooden wedges are placed between the laminate and the wall.

Having reached the opposite wall, measure the remaining distance, and cut the laminate to size with a jigsaw. From the piece remaining after trimming, the installation of the next row begins. A piece of laminate is suitable for laying if its length is 20 cm or more. However, we note that too short pieces can make the floor pattern sloppy. To avoid this, you can cut a piece 2/3 of the length from the new panel, laying out the laminate in a “third of the length” offset method.
Thus, a beautiful visual effect is achieved when the end seams of adjacent rows of panels do not coincide in one place, but run apart. The assembly of the second row of panels is carried out in the same way as the first.
All subsequent rows of laminate are mounted in the same way. In this case, the locks, if necessary, can be lightly tapped with a hammer through a wooden block.

During installation, care should be taken to ensure that there are gaps between the laminate and the walls on all sides of the room.
When all the laminate has been laid and only the last row of panels remains, it may usually be necessary to cut them in half lengthwise. It is best to cut the laminate with a jigsaw, trying to make it as even as possible. However, even if the line is not perfect, it will still not be visible under the baseboard.
Upon completion of all installation work, the wedges between the laminate and the walls are removed, after which the gaps are closed with skirting boards around the perimeter of the room.